DevOps Project-23: DevSecOps - Blue-Green Deployment of Swiggy-Clone on AWS ECS with AWS Code Pipeline
- Authors

- Name
- NotHarshhaa
- GitHub
Introduction:
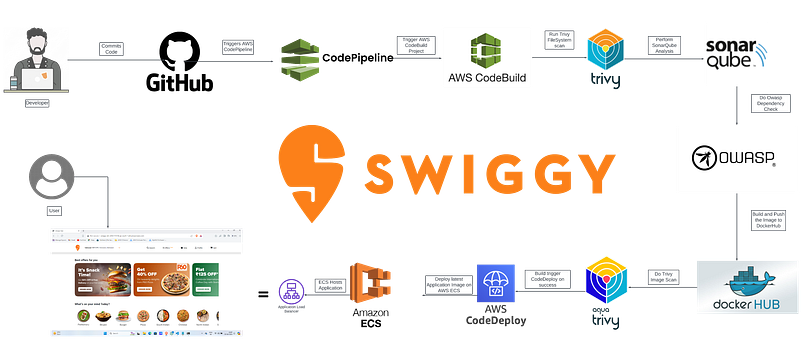
In the realm of modern software development, DevSecOps practices are gaining prominence for their emphasis on integrating security seamlessly into the software development lifecycle. One critical aspect of this approach is implementing efficient deployment strategies that not only ensure reliability but also maintain security standards. In this blog post, we will delve into the concept of Blue-Green deployment and demonstrate how to apply it to a Swiggy-clone application hosted on AWS ECS (Elastic Container Service) using AWS Code Pipeline.
What is Blue-Green Deployment?
Blue-Green deployment is a technique used to minimize downtime and risk during the release of new versions of an application. In this approach, two identical production environments, termed ‘Blue’ and ‘Green’, are maintained. At any given time, only one environment (e.g., Blue) serves live traffic while the other (e.g., Green) remains idle. When a new version is to be deployed, the new version is deployed to the idle environment (Green). Once the deployment is validated, traffic is seamlessly switched to the updated environment (Green), allowing for quick rollback to the previous version if issues arise.
Setting up AWS ECS for Swiggy-Clone:
To demonstrate Blue-Green deployment, we’ll use AWS ECS to host our Swiggy-clone application. ECS is a highly scalable container orchestration service provided by AWS.
Implementing Blue-Green Deployment with AWS CodePipeline:
AWS CodePipeline is a fully managed continuous integration and continuous delivery (CI/CD) service that automates the build, test, and deployment phases of your release process. Let’s see how to set up a Blue-Green deployment pipeline using AWS CodePipeline:
1. Source Stage: Connect your CodePipeline to your source code repository (e.g., GitHub). Trigger the pipeline when changes are detected in the repository.
2. Build Stage: Use AWS CodeBuild to build your Swiggy-clone Docker image from the source code. Run any necessary tests during this stage.
3. Deploy Stage: Configure AWS CodeDeploy for ECS to manage the deployment of your application to ECS clusters. Here’s where Blue-Green deployment strategy comes into play:
- A. Define two ECS services: Blue and Green.
- B. Use CodeDeploy to deploy the new version of your Swiggy-clone application to the Green service.
- C. After deployment, automate the ALB routing to gradually shift traffic from the Blue service to the Green service based on predefined health checks.
- D. Monitor the deployment process and rollback automatically if issues occur during the transition.
GitHub Source Code Repo: HERE
Step:-1 : Create a Sonar Server
To run Static Code Analysis we need a sonar server.
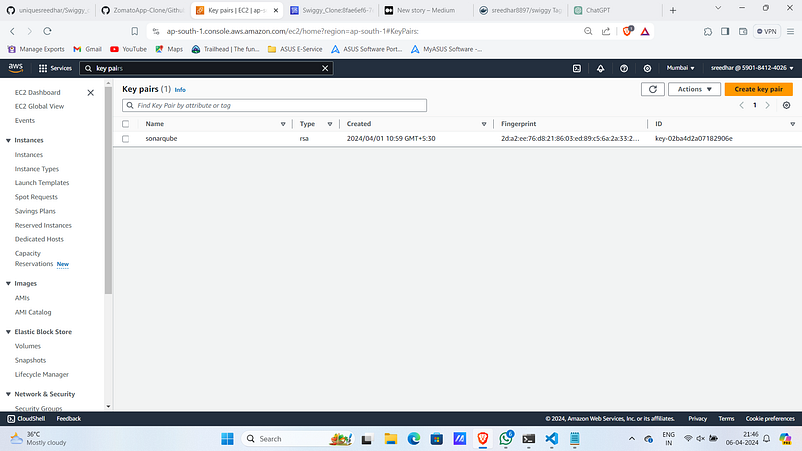
Create a key-pair for this purpose.
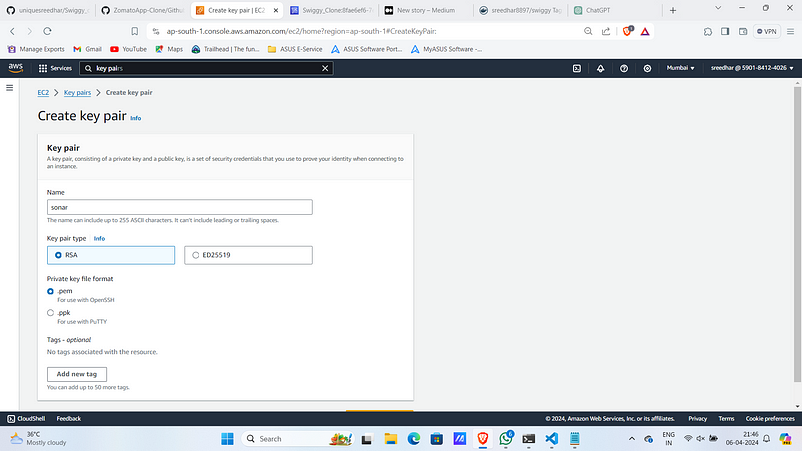
i. Navigate to key-pairs in AWS Console and click on “Create key- pair”.
ii. Provide a name and select key-pair rype as .pem then click on create.
The .pem file will be downloaded to your local.
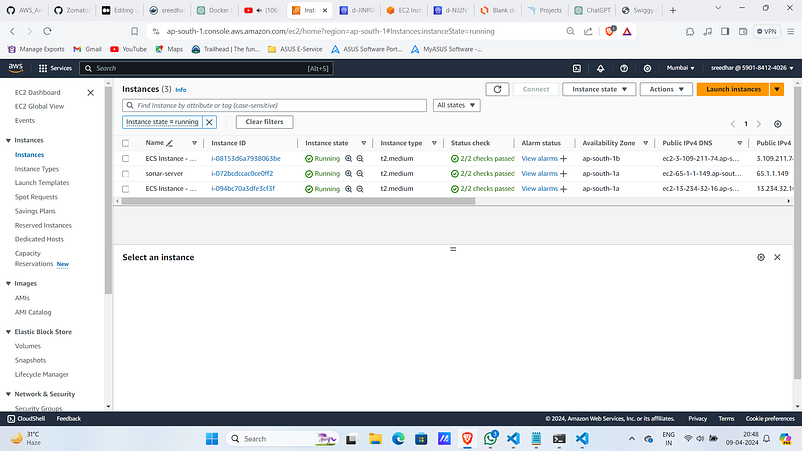
3. Navigate to EC2 console and click on “Launch Instance”.
4. Give a name for it.
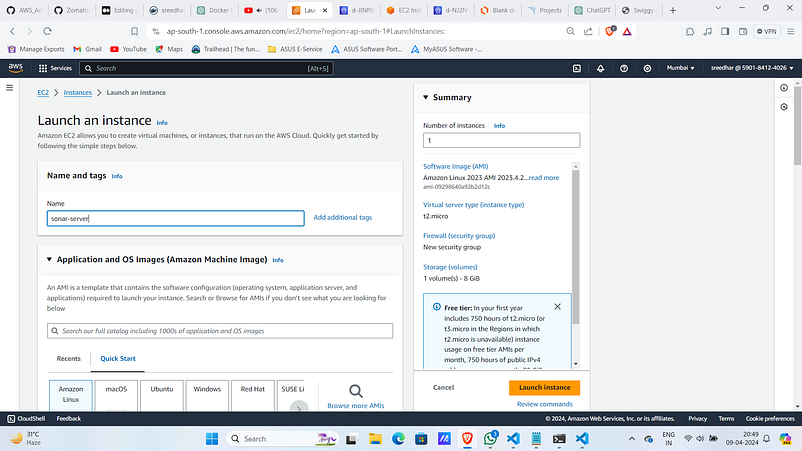
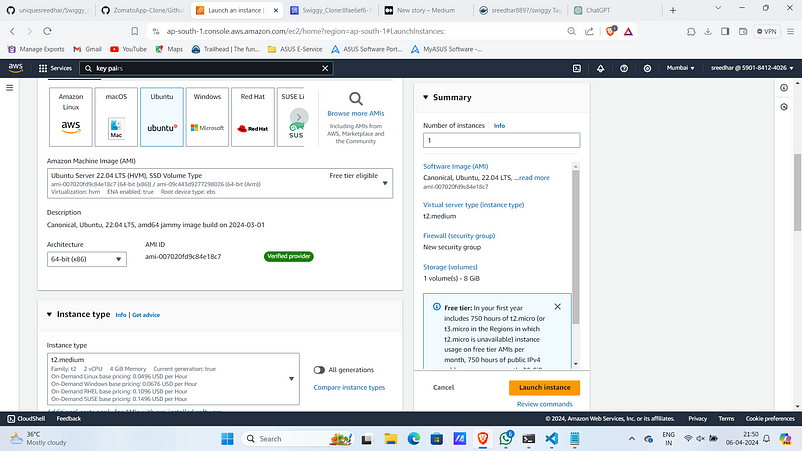
5. Select AMI as “Ubuntu” and instance type as “t2.medium”.
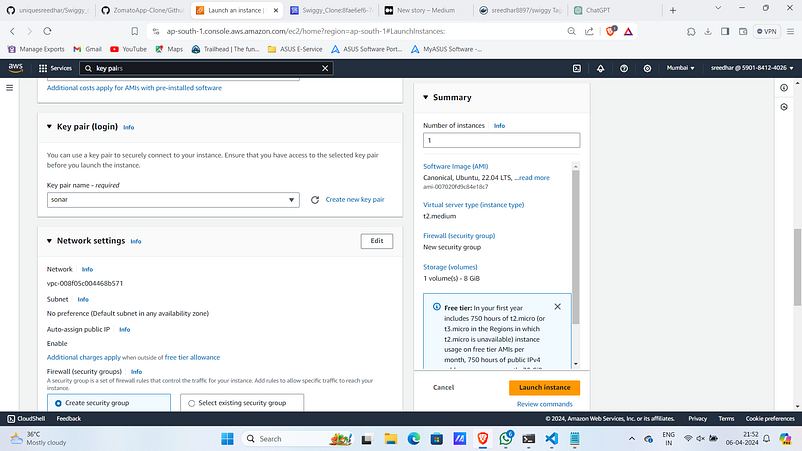
6. Under key-pair select the created one.
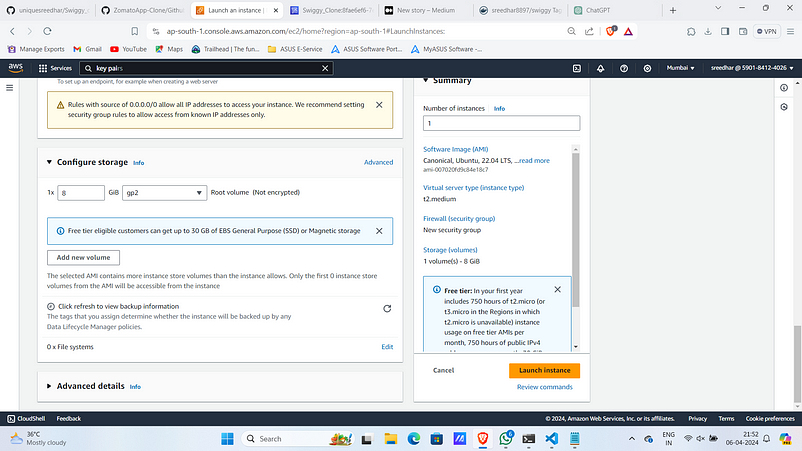
7. Click on “Launch Instance” by leaving other things as default.
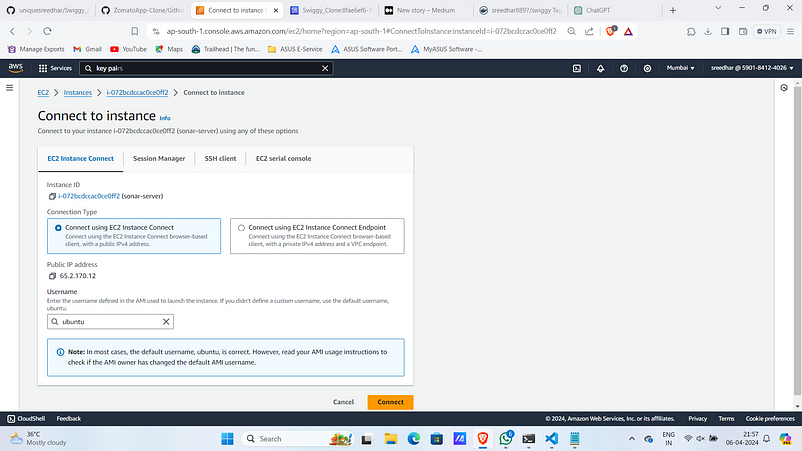
8.Once the instance is up and running select it and click on “connect”.
You can use EC2 instance connect or SSH with the pem file you downloaded.
9. Install docker.
# Installing Docker
sudo apt update
sudo apt install docker.io -y
sudo usermod -aG docker ubuntu
sudo systemctl restart docker
sudo chmod 777 /var/run/docker.sock

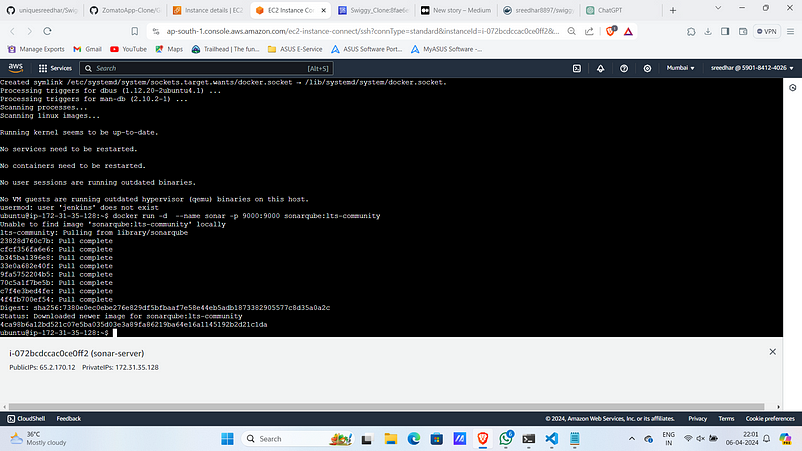
10. Run sonarqube as a docker container.
# Run Docker Container of Sonarqube
#!/bin/bash
docker run -d  --name sonar -p 9000:9000 sonarqube:lts-community
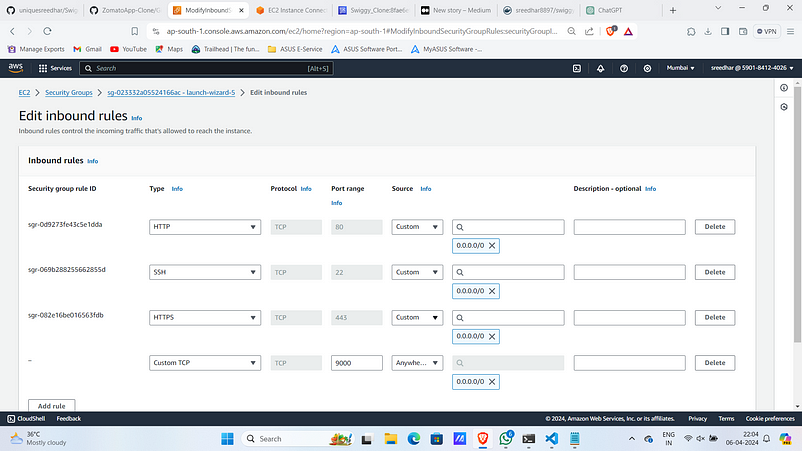
11. Ensure that port 9000 is opened in security group of that particular instance.
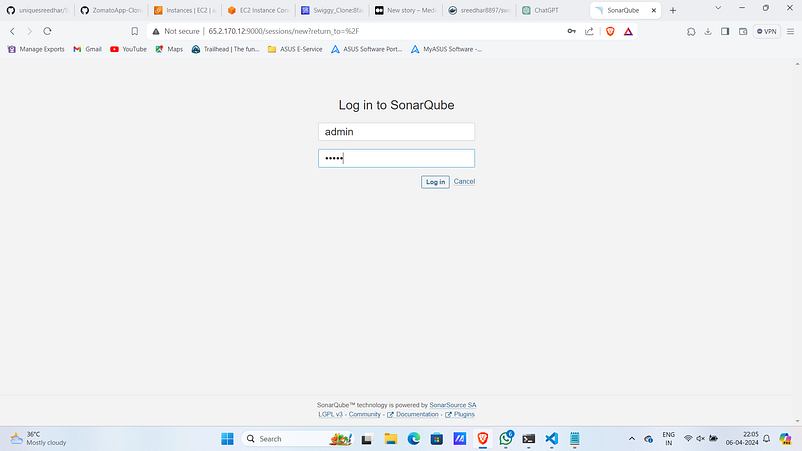
12. Access SonarQube on <public_ip>:9000
Username & Password: admin
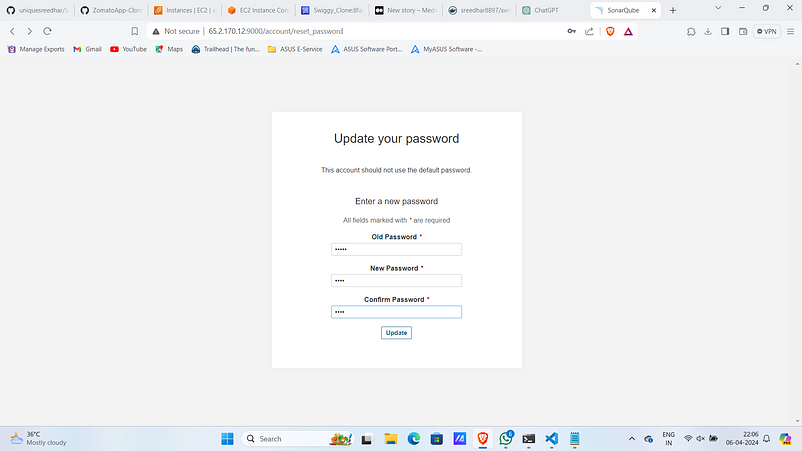
Step:2 :- SonarQube Set-Up.
- After getting log-in create a custom password.
2. Click on “manually” (<>).
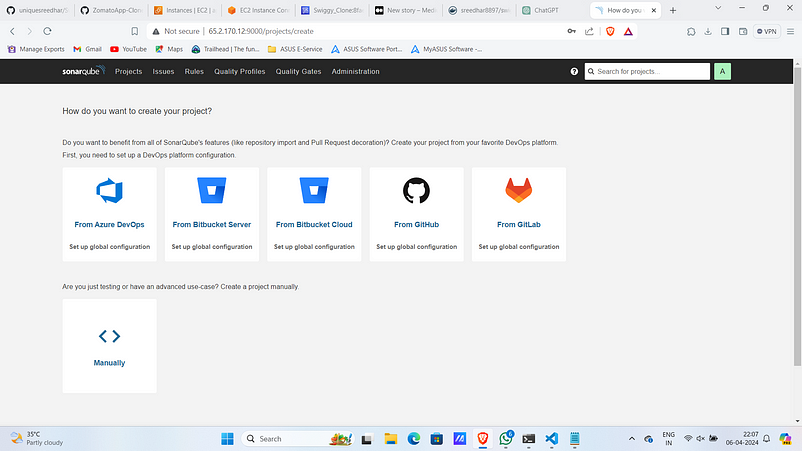
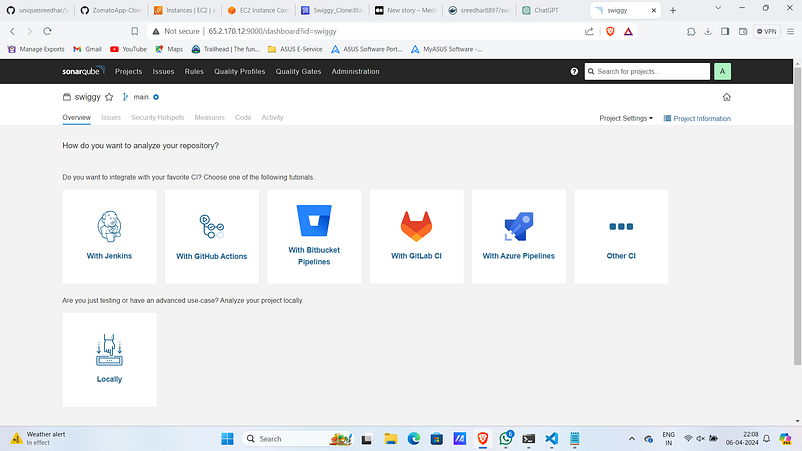
3. Click on “locally”.
4. Provide a name for it.
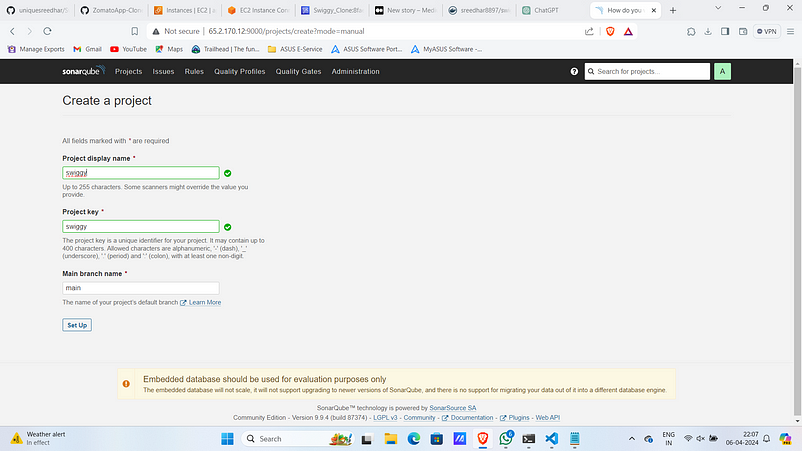
5. Click on “Set Up” .
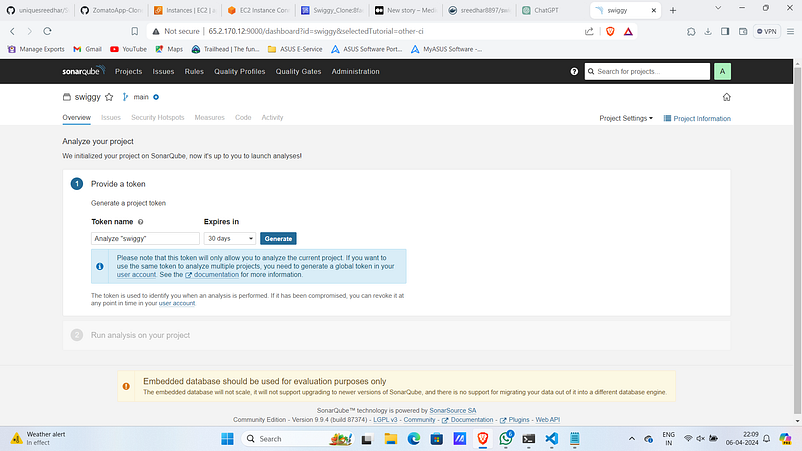
6. Click on “Generate” and create one.
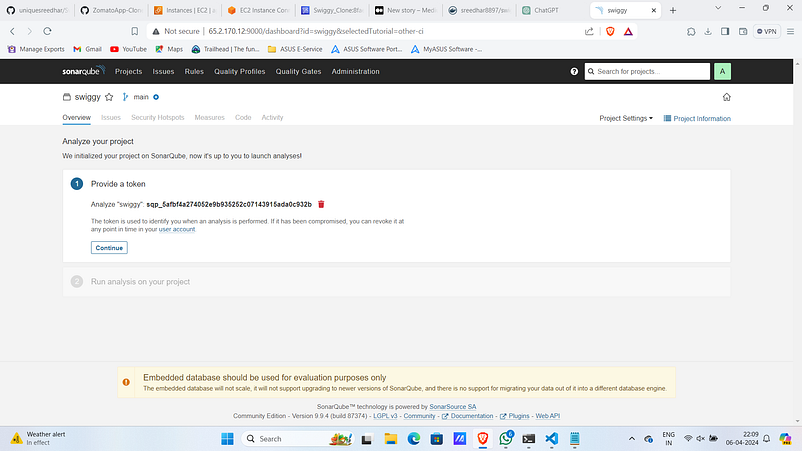
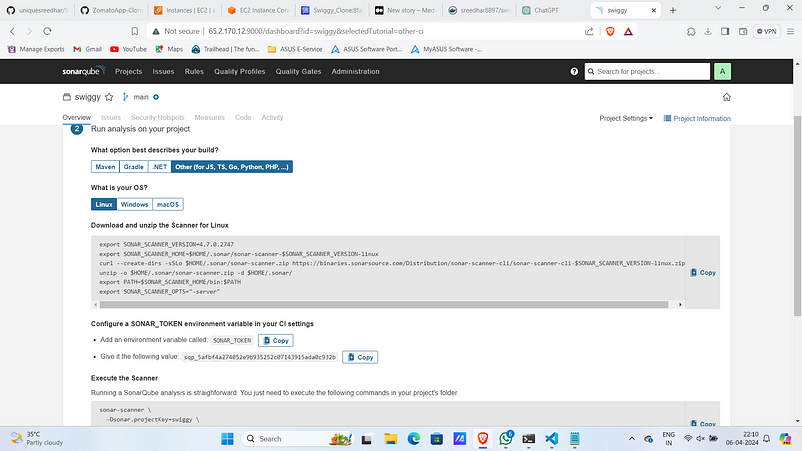
7. Then Under code select other and os as linux. Then Copy sonar token.
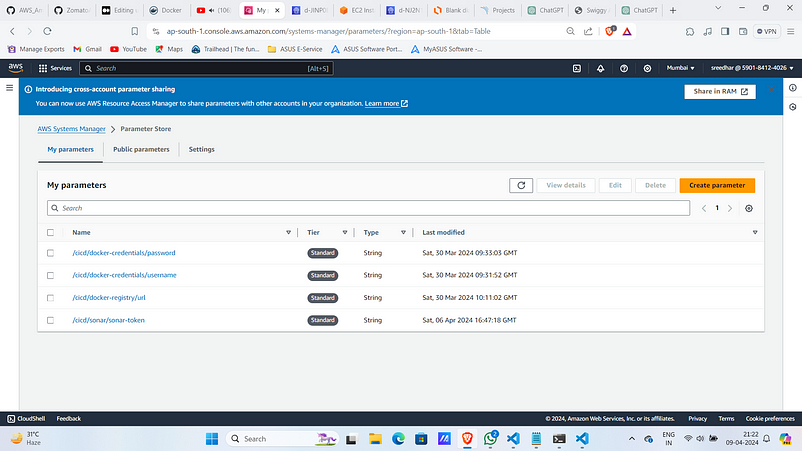
8. In the AWS console search for “Systems Manager” and then “Parameter Store”.
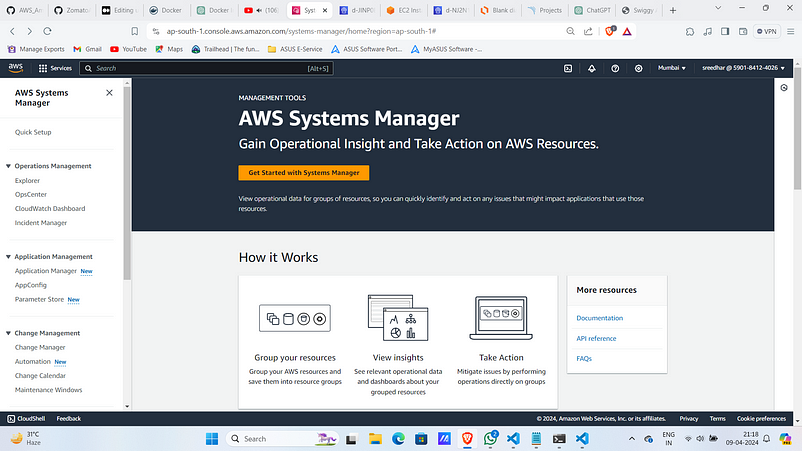
9. Click on “create parameter”.
9. Give a name for it.
Note: This must be edited in buildspec.yaml file.
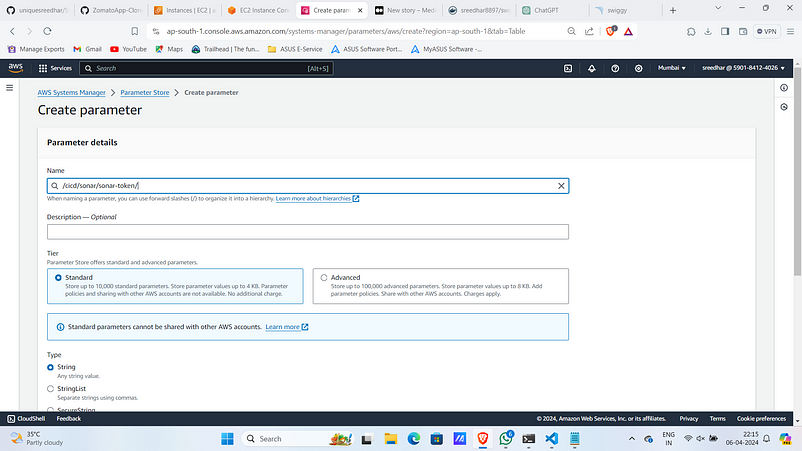
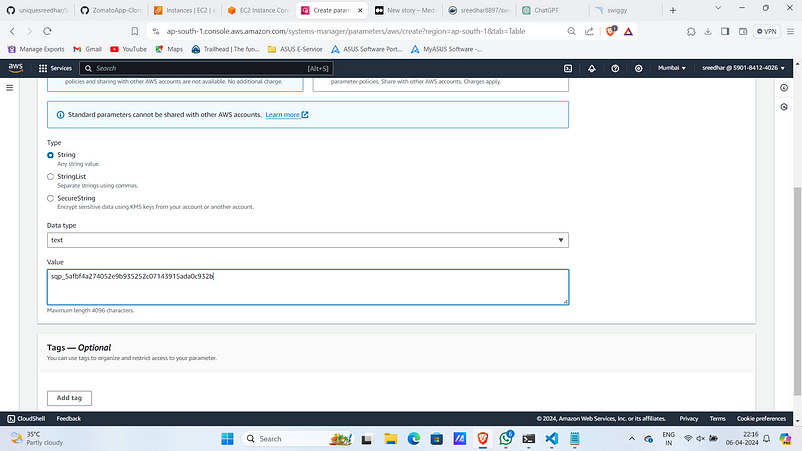
10. Provide the copied token in the value section.
11. Similarly create parameters for Docker Username, Password and URI.
#In my case
Parameter name: /cicd/sonar/sonar-token             Value: <sonar_token>
Parameter name: /cicd/docker-credentials/username   Value: <docker_username>
Parameter name: /cicd/docker-credentials/password   Value: <docker_password>
Parameter name: /cicd/docker-registry/url           Value: docker.io
Note: You need to give your Sonar URL and Project Key in buildspec.yaml
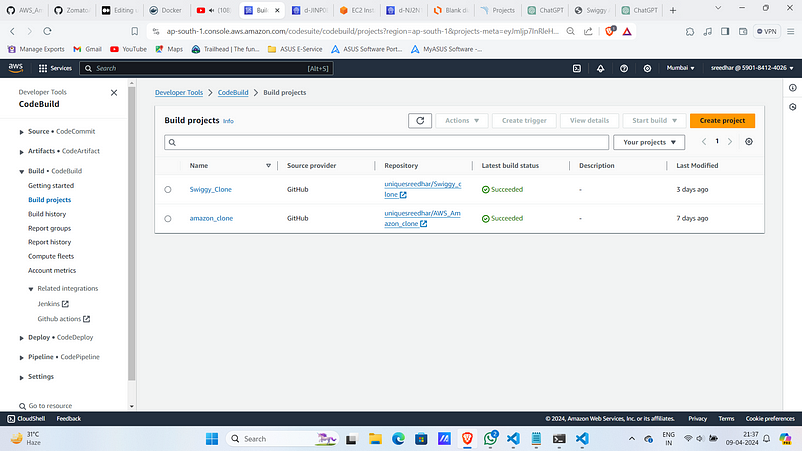
Step:-3 : Create AWS Code Build Project
- Navigate to AWS Codebuild console and click on “create project”.
2. Provide a name for it.
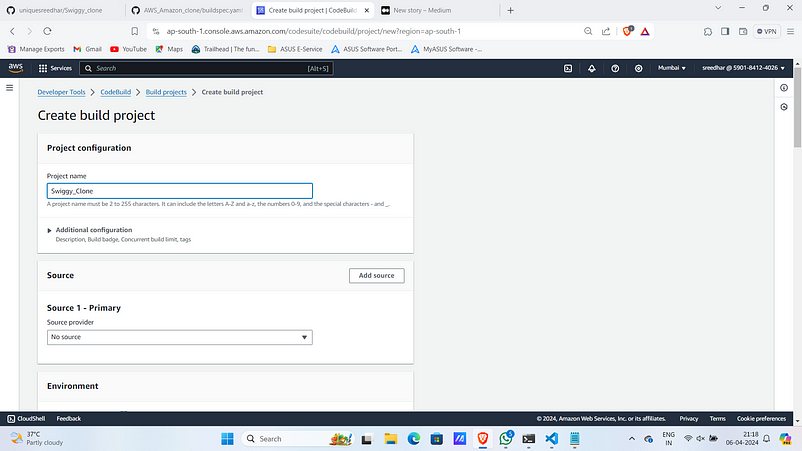
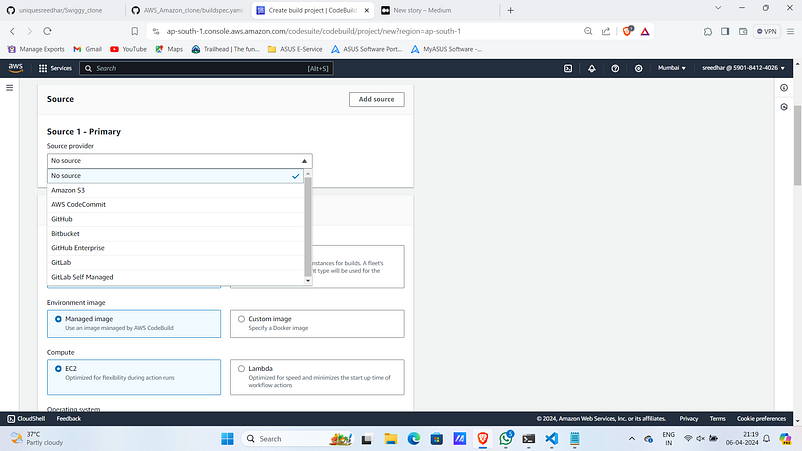
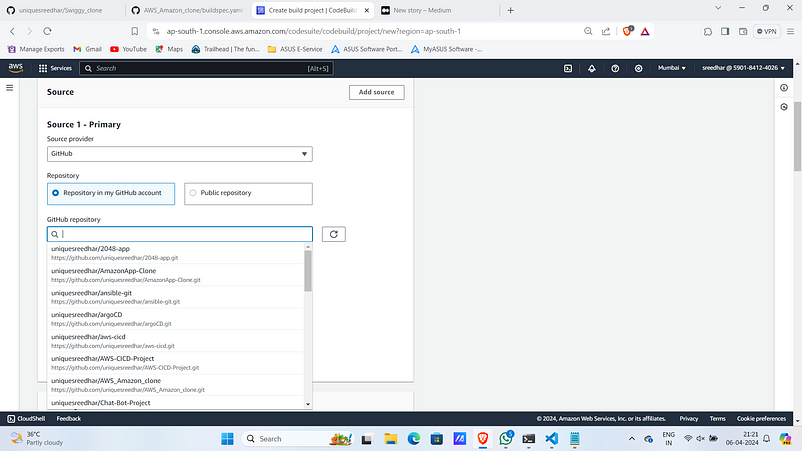
3. Under source select github as a source provider.
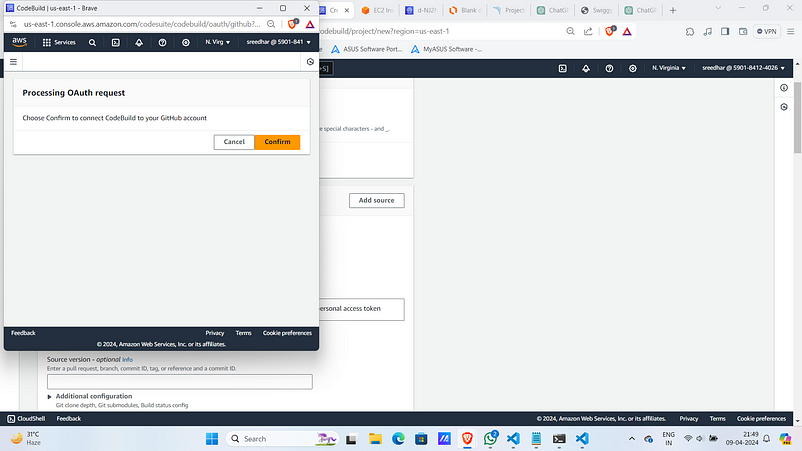
4. Select Connect using OAuth.
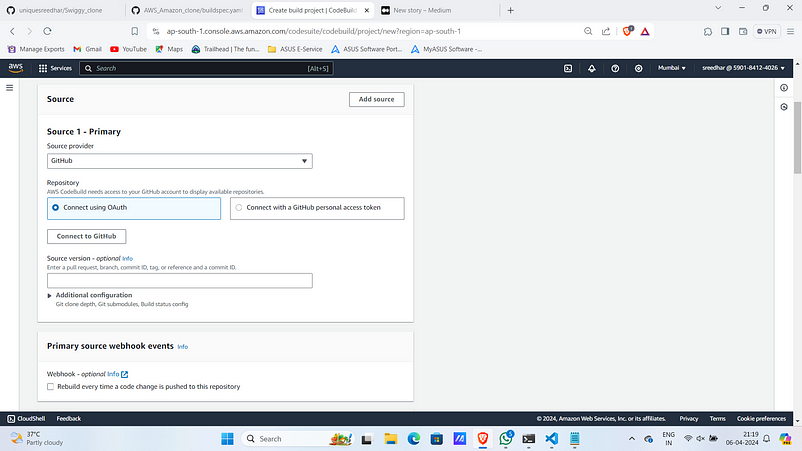
5. After this it will ask for permissions and github login do all the stuff.
6. Under GitHub repo, select the one your application code relies.
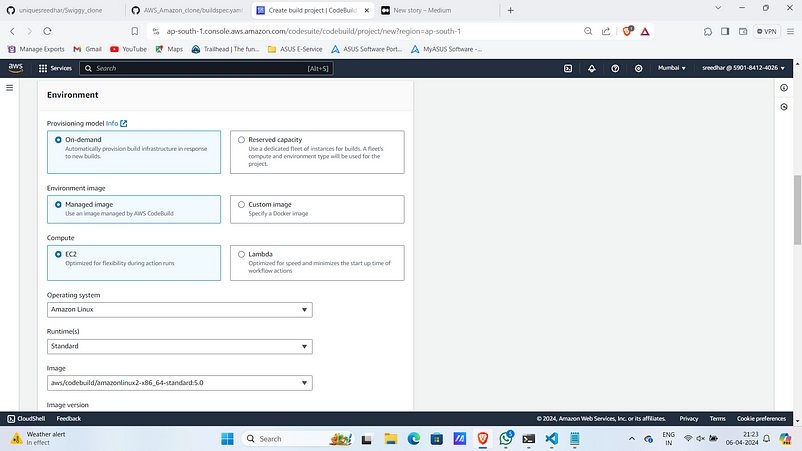
7. Under Environment leave all of them as default.
8. Under Buildspec select “Use a buildspec file” and provide the name as “buildspec.yaml”.
![]()
9. Under Artifacts Use an already created s3 bucket.
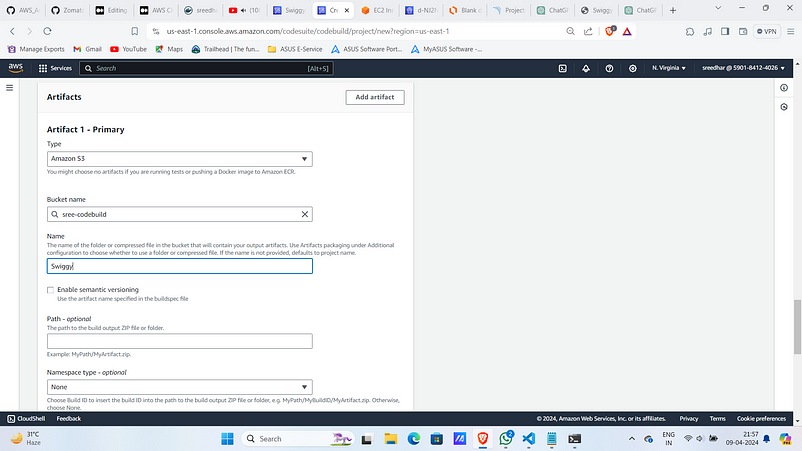
10. Click on “Update project”.
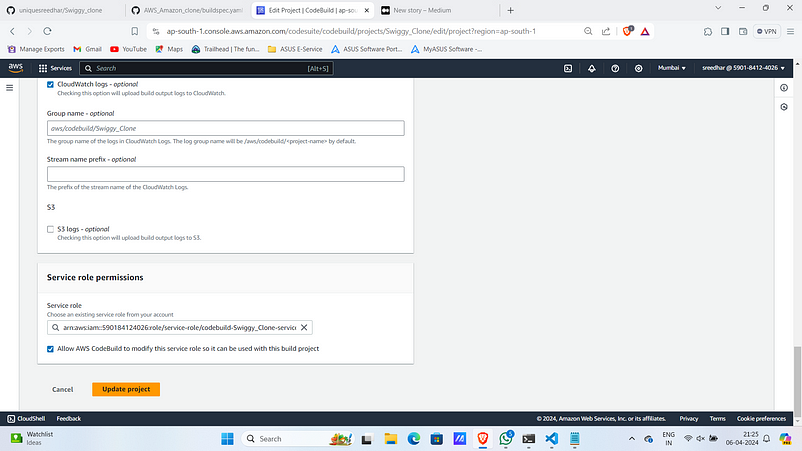
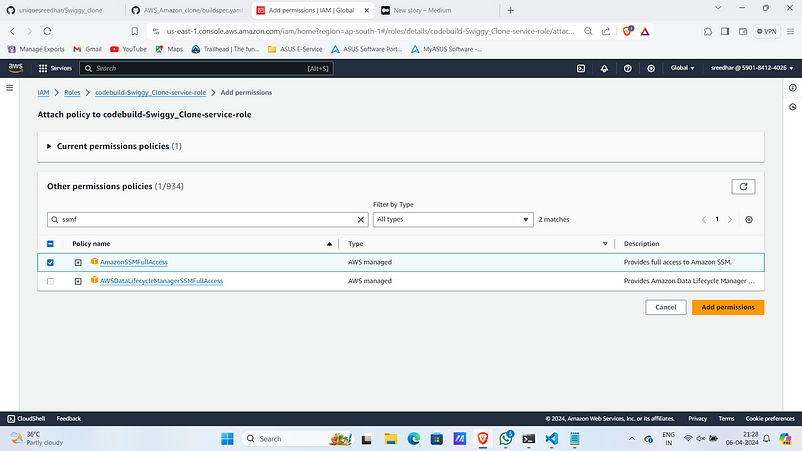
11. In IAM click on the role that the codebuild created.
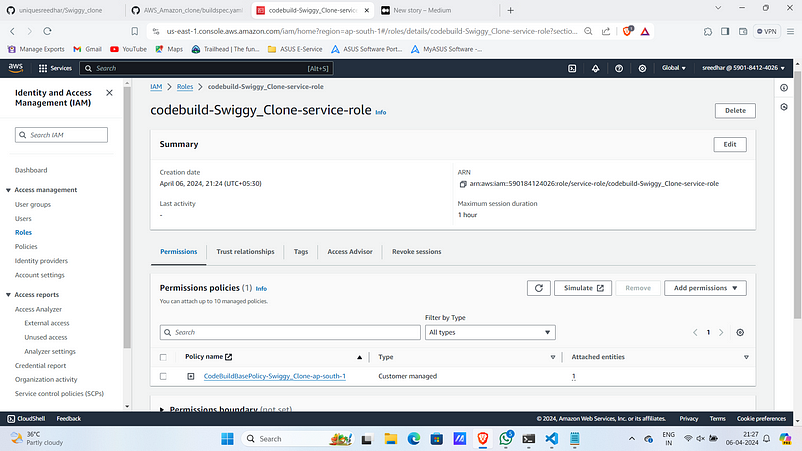
12. Give “AmazonSSMFullAccess” to access the parameters in Systems Manager and “AWSS3FullAccess” to upload the artifacts.
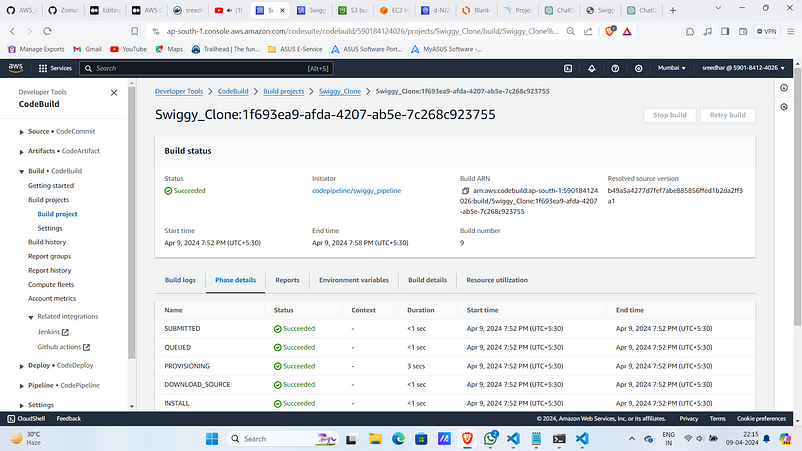
13. Click on “Start build”.
Upon successful build it will look like:
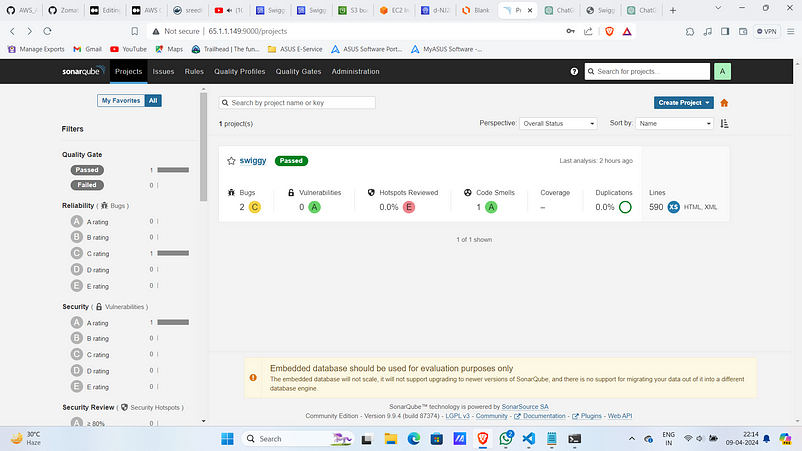
SonarQube Analysis:
Dependency-Check reports:
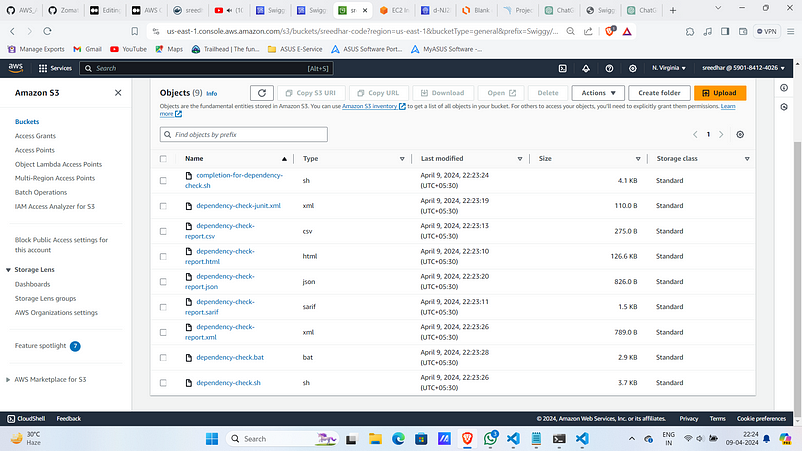
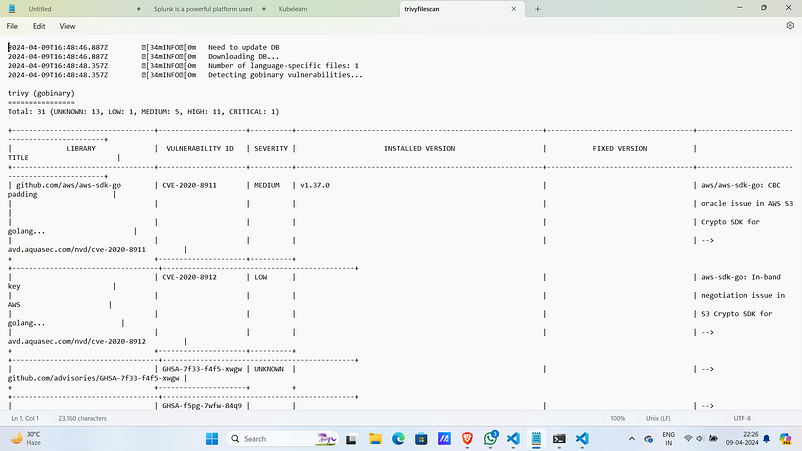
Trivy File Scan:
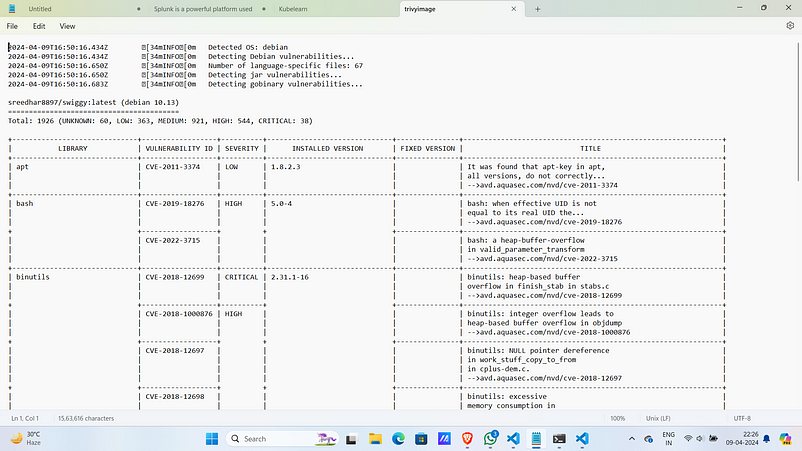
Trivy Image Scan:
Step:4A :- ECS Cluster Creation
- Navigate to ECS and click on “Create cluster”.
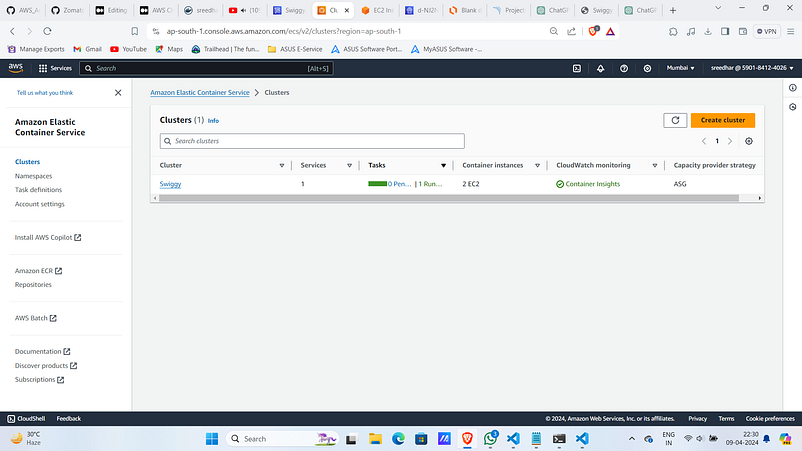
2. Provide a name for it.
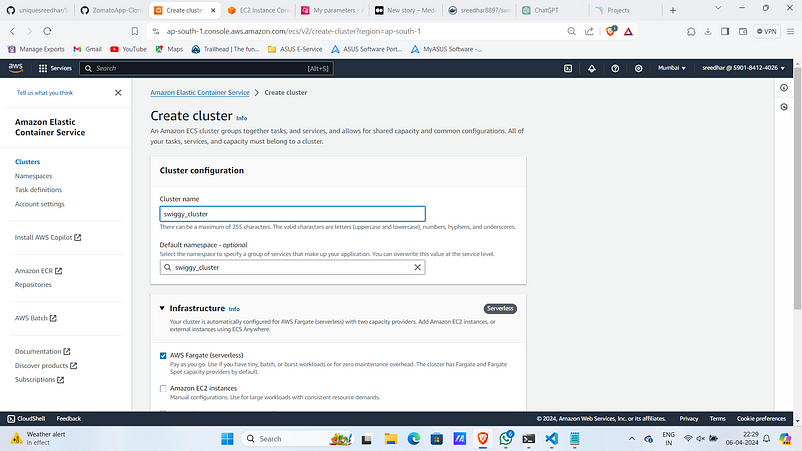
2. Under infrastructure select “Amazon EC2 instances”
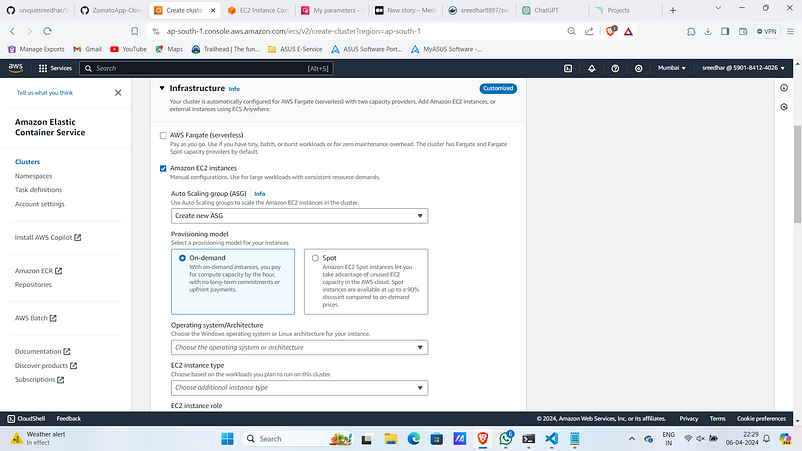
3. Give OS as Amazon Linux 2 and instance type as “t2.medium”.
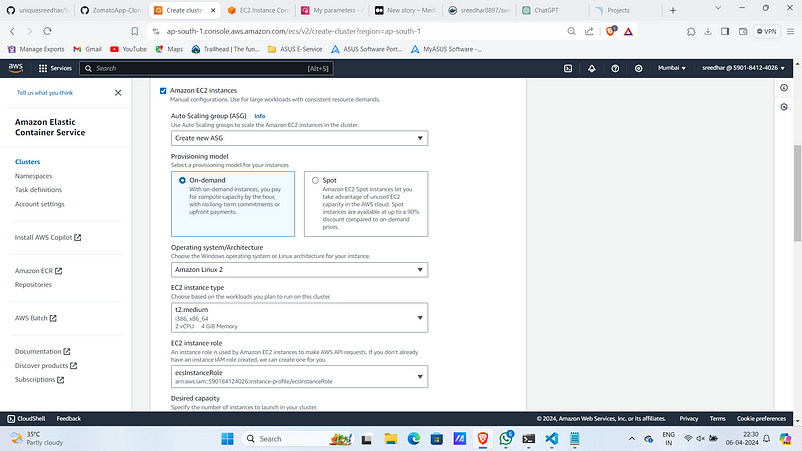
4. Give Desired Capacity min as 2 and max as 3.

5. Under Network settings Select the VPC and the subnets on which instances to be launched.
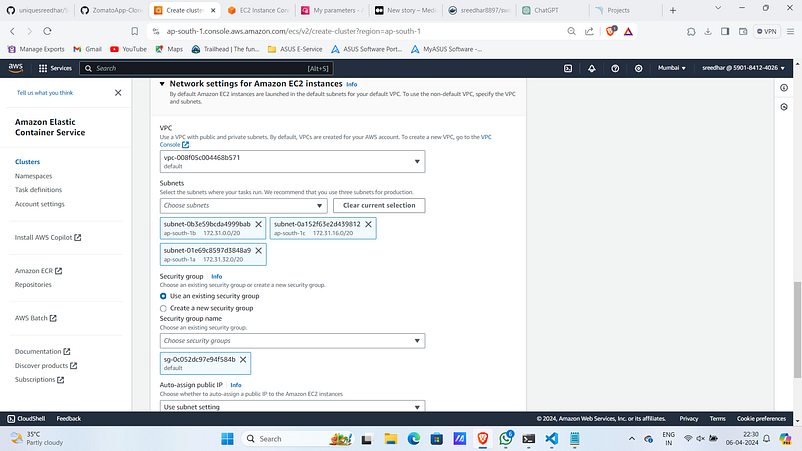
6. Enable the container insights under monitoring and click “create” .

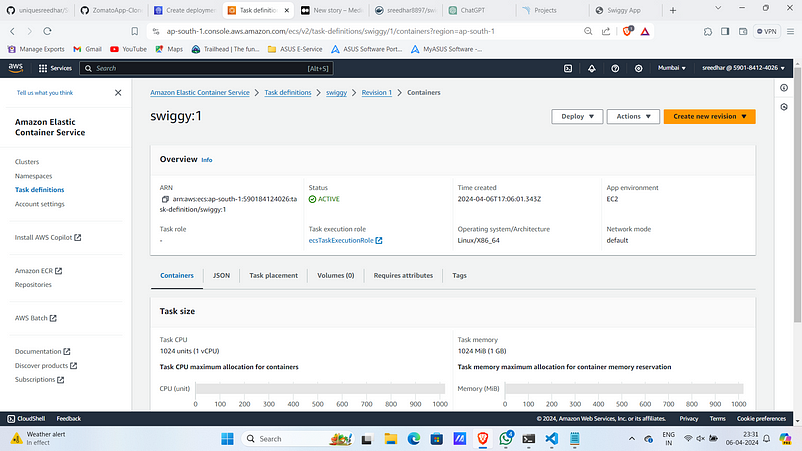
Step:4B :- ECS Task Definition Creation
- In the same ECS console click on “Task Definition” and then “create new task definition”

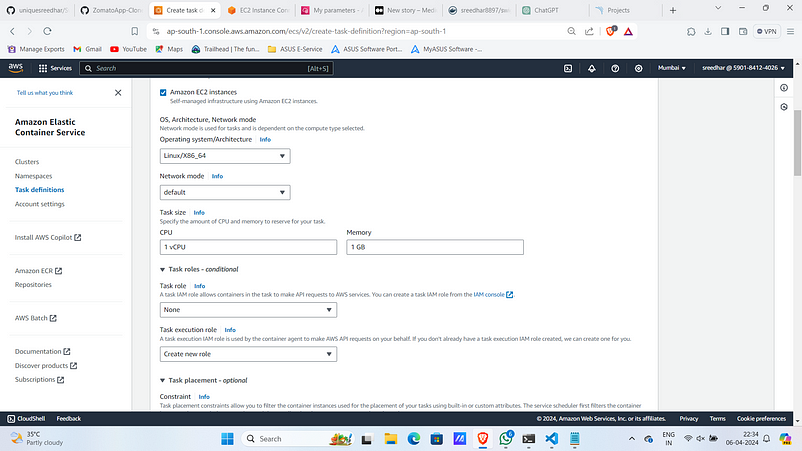
2. Give a name for it and under “infra requirements” select “Amazon EC2 instances”.
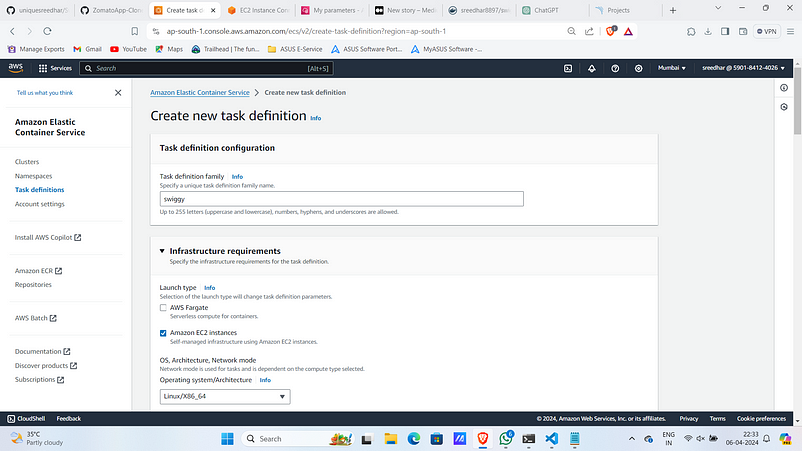
3. Give the configuration as below.
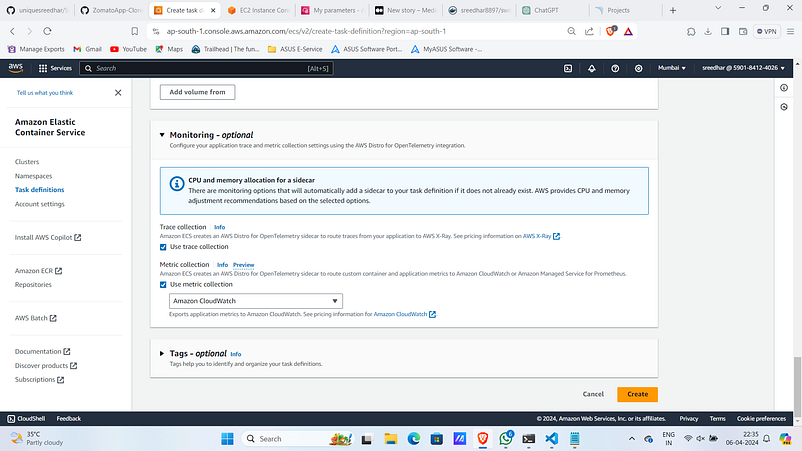
4. Under container provide Name, Image and container port .

5. Under monitoring select as below and click “create”.
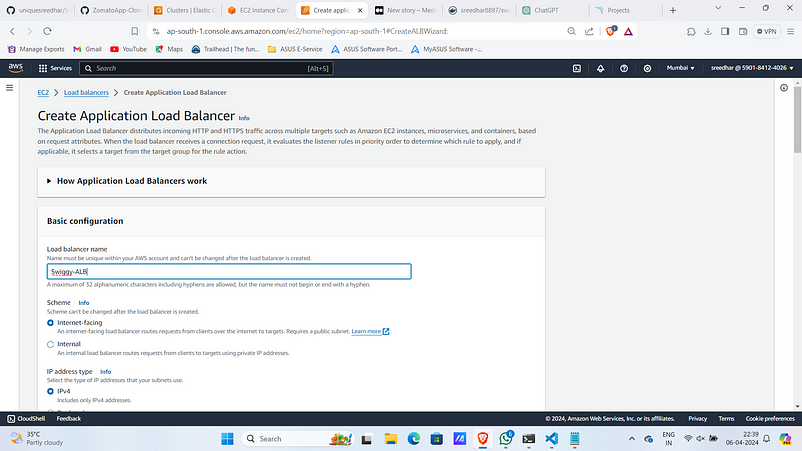
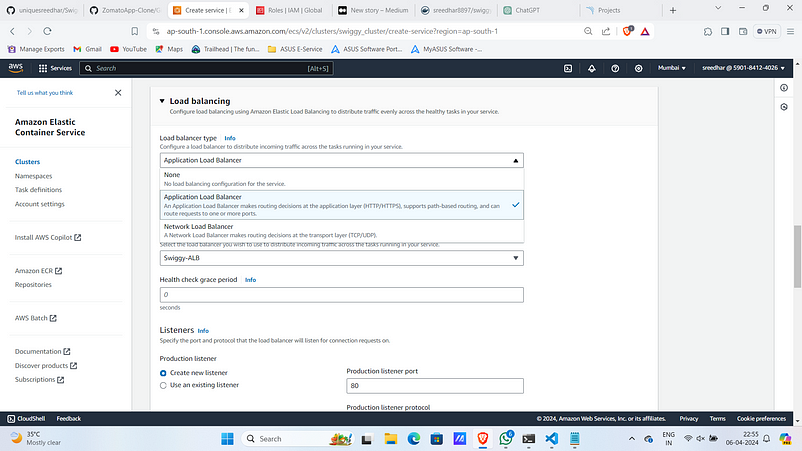
Step:4C :- Load Balancer Creation
- Navigate to EC2 and under Load Balancer click on “Create load balancer”.
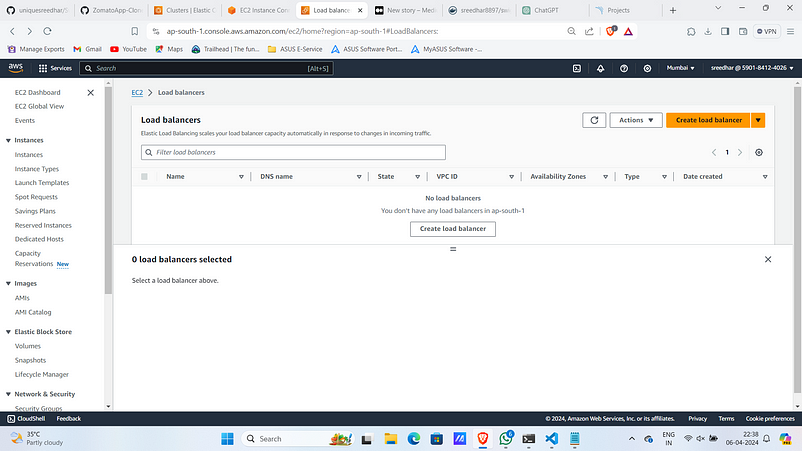
2. Select “Application Load Balancer”.

2. Provide a name for it.
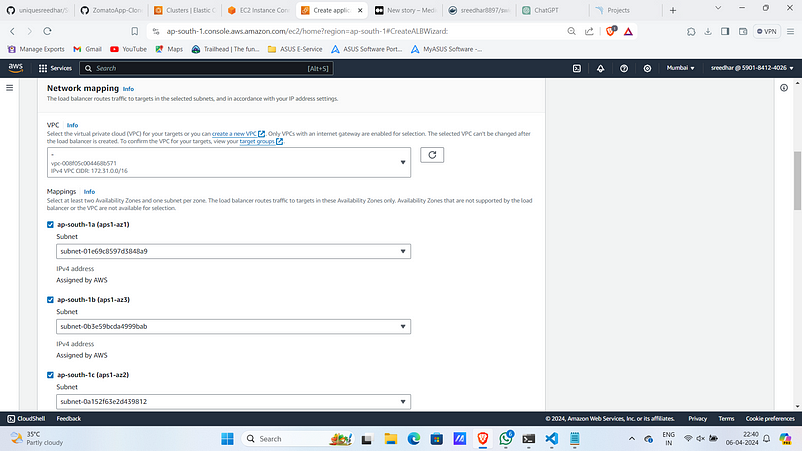
3. Under Network mapping select the vpc sand subnets.
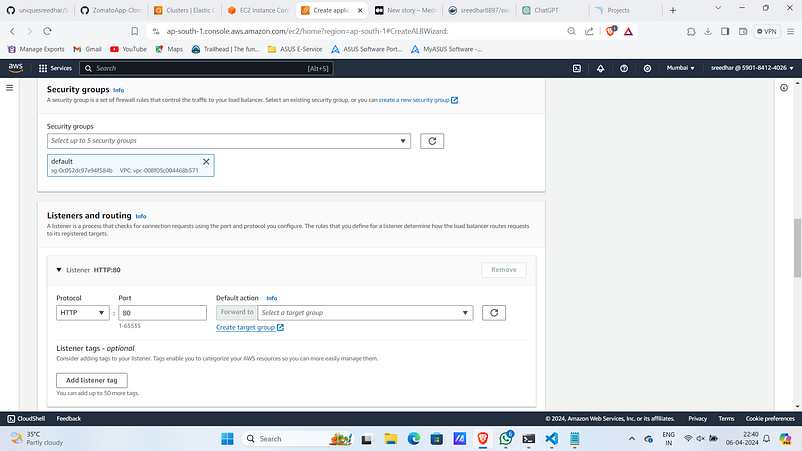
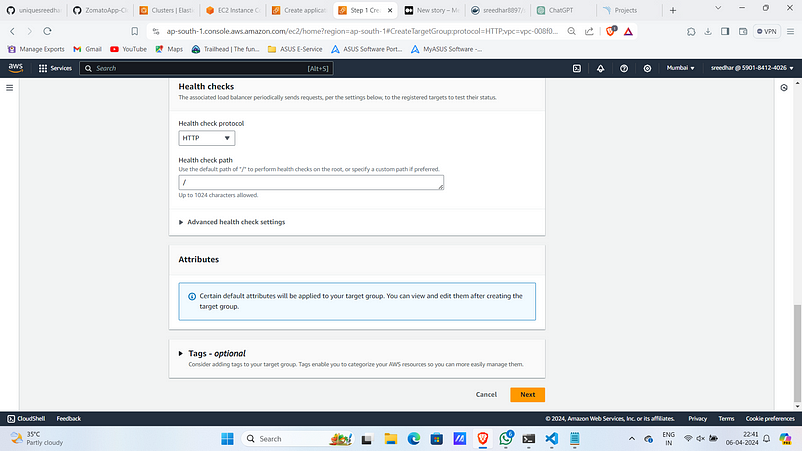
4. Under Listeners and routing click on “Create target group”.
5. Give a target group name.
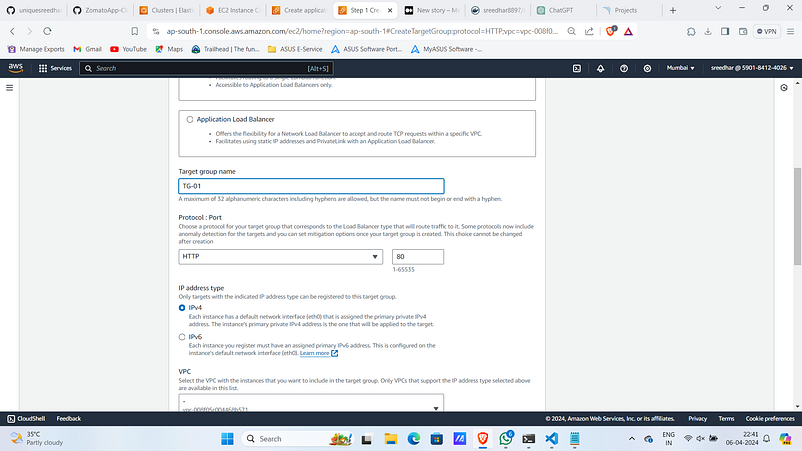
6. Click on “Next”.
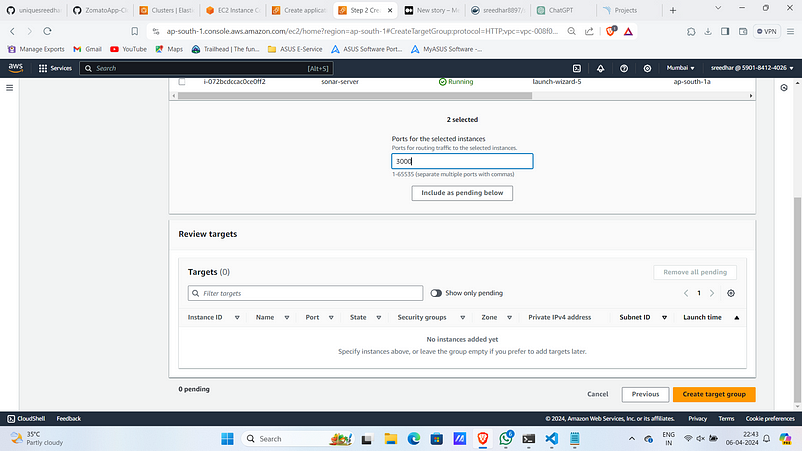
7. Select the ECS registered instances and give port for them.

8. Click on “Create target group”.
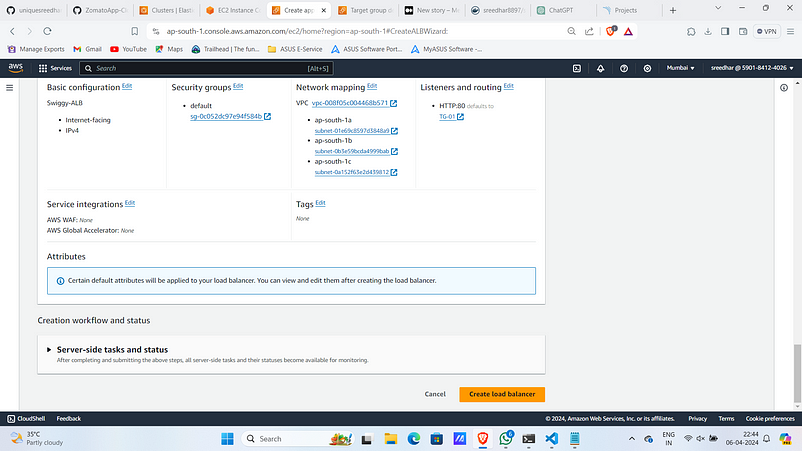
9. In the Load balancer select the created one.

10. Click on “Create load balancer”.
11. To access ECS Code Deploy needs a role so let’s create a one.
Navigate to roles in IAM and click on “Create role”.
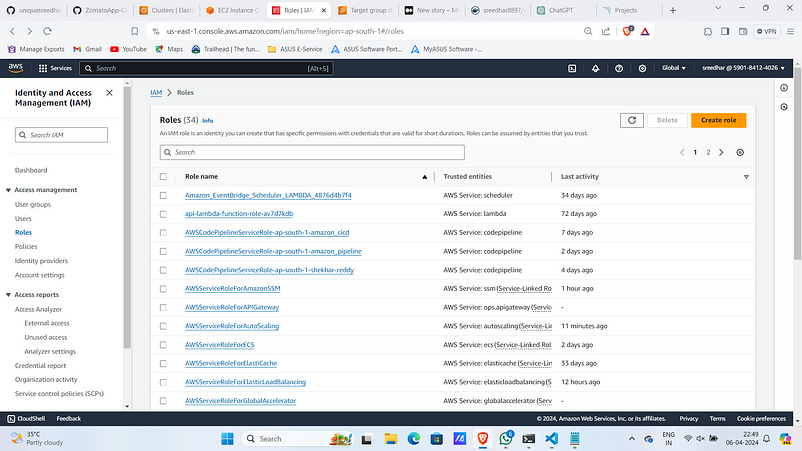
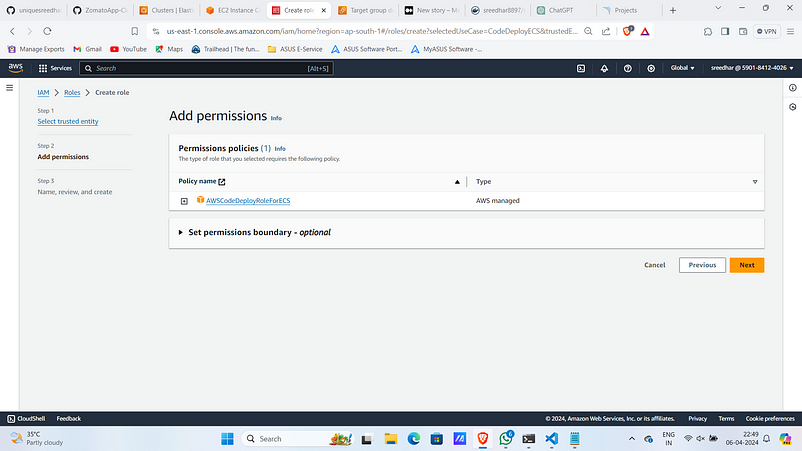
12. Select Use case as “CodeDeploy-ECS”
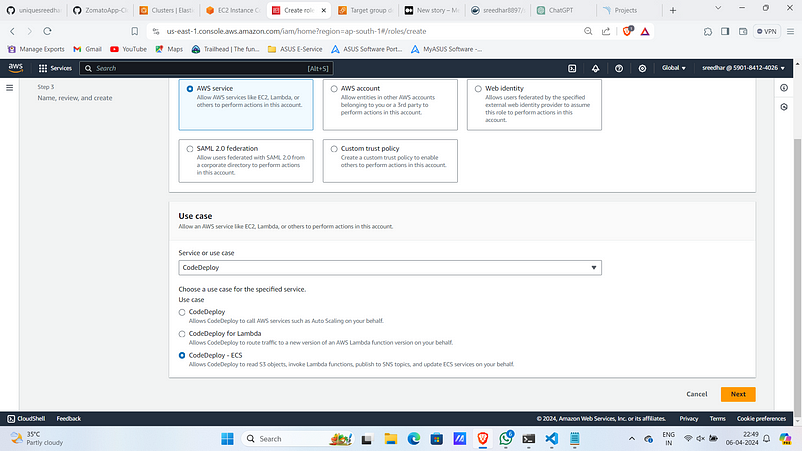
13. Click on “Next”.
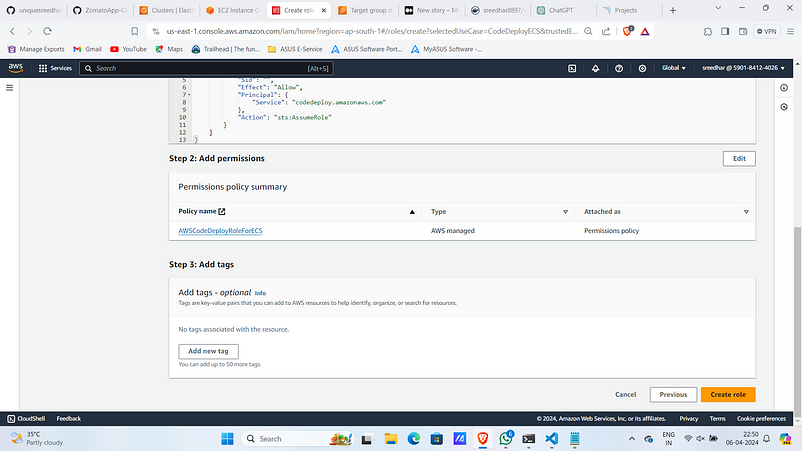
14. Give a name for it.
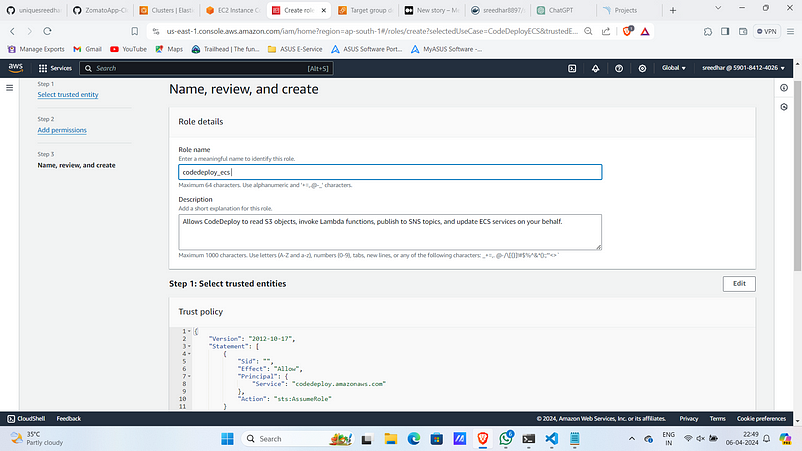
15. Click on Create.
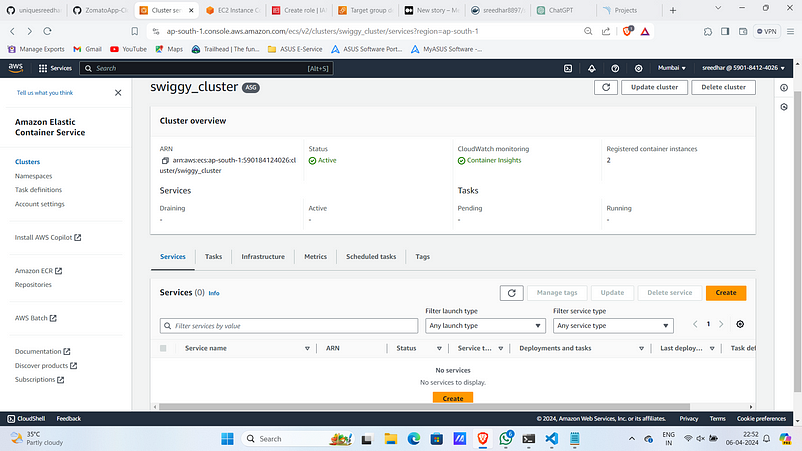
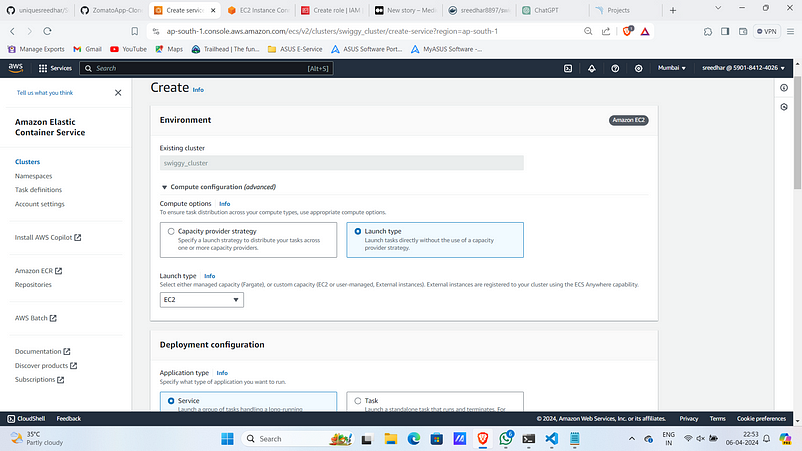
Step:4D :- ECS Service Creation
- Under Created ECS cluster and Service section click on “create”.
2. Opt Compute as “Launch type”.
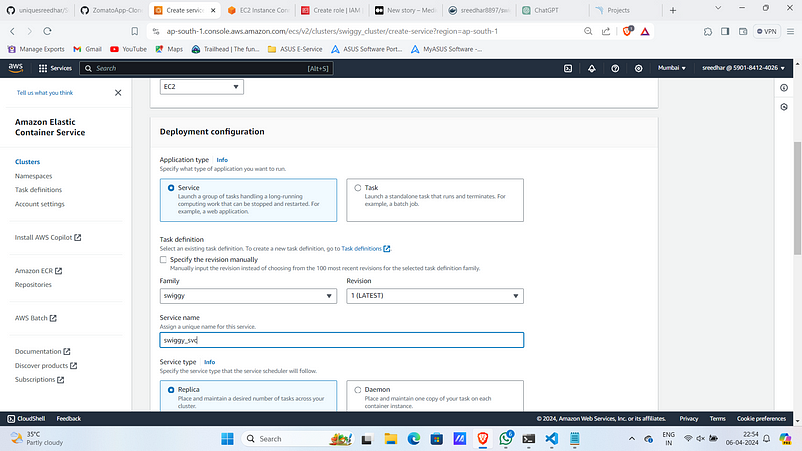
3. Under Deployment config select Family as the created task definition and give it a name.
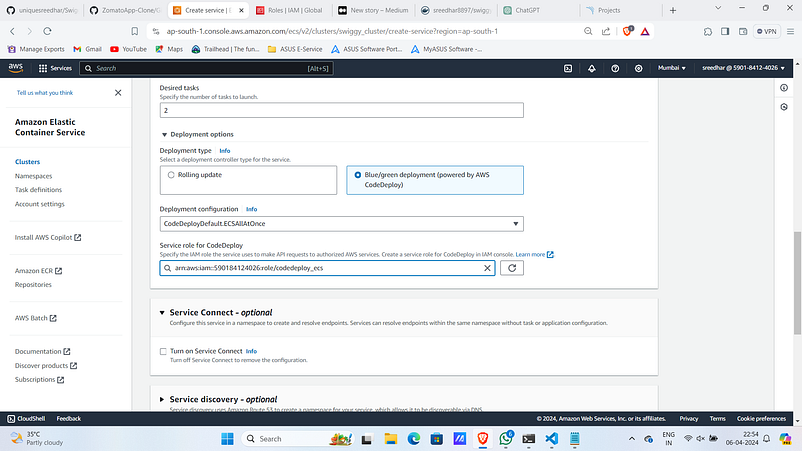
4. Give desired tasks as 1 and Under Deployment options select Deployment type as “Blue/green deployment” then provide service role you created earlier.
5. In the Load balancing section select type as ALB and opt the one you have created.
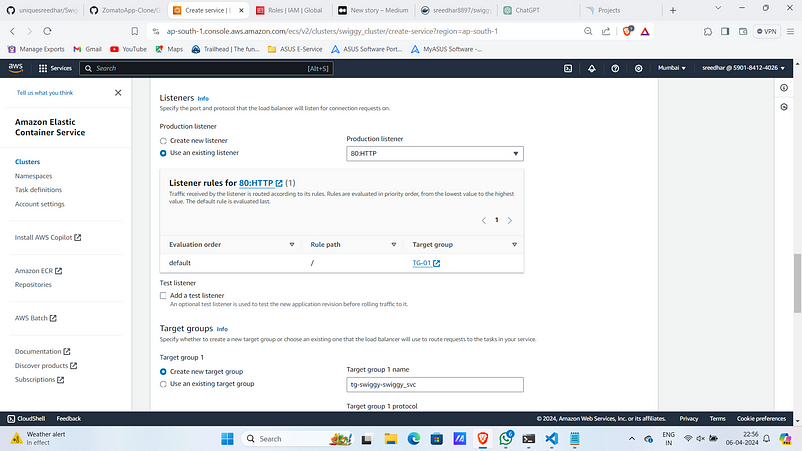
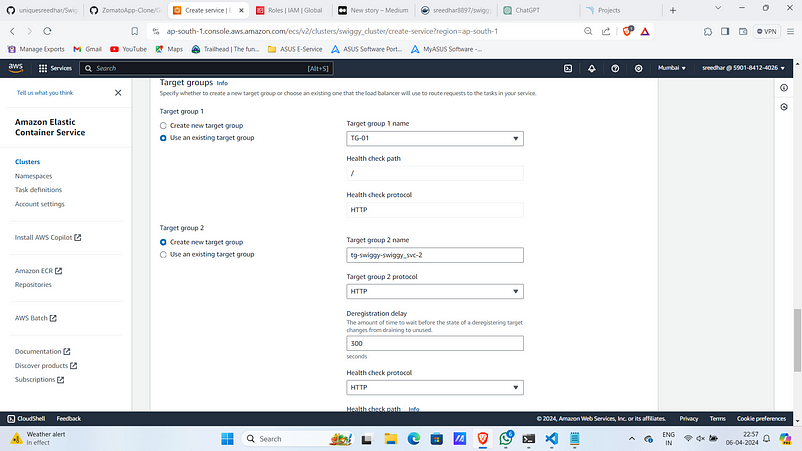
6. Use existing Listener and Target group and TG-2 create a one.
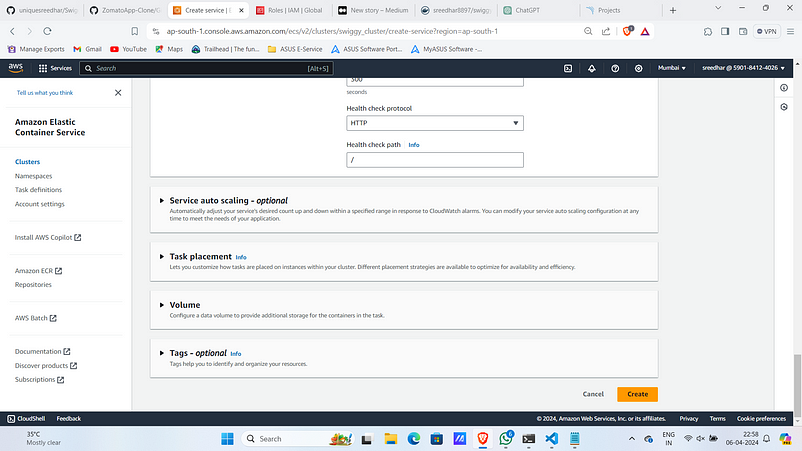
7. Click on “Create”
8. Upon Successful service creation it looks like as:
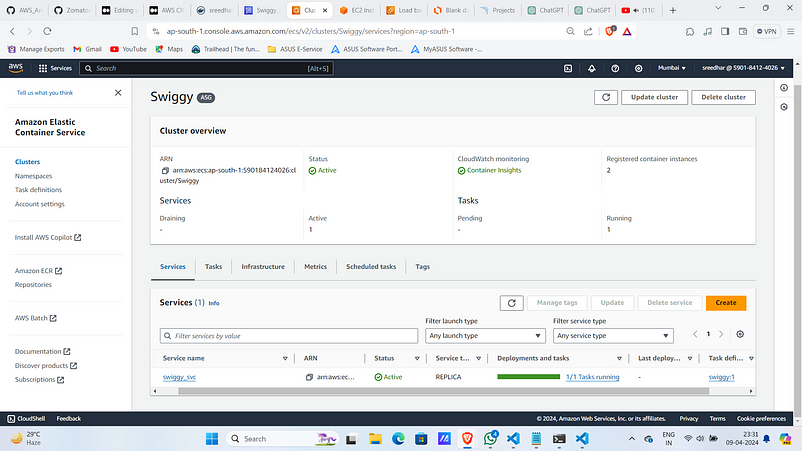
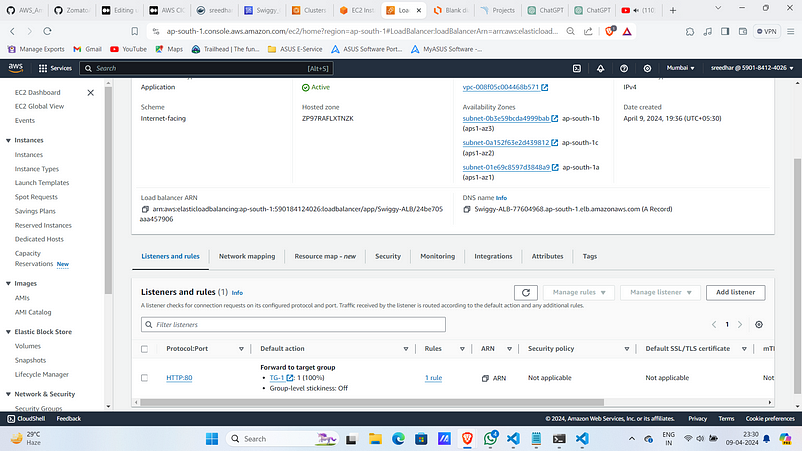
9. Navigate to load balancer and copy the DNS name.
Observe that the traffic to routing to target group TG-1.
10. Paste it on your favorite browser.
Observe that the tab name is “Swiggy Application”.

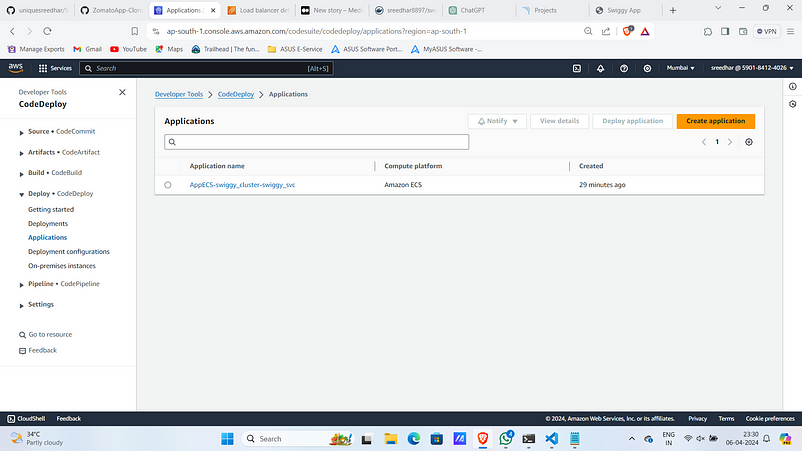
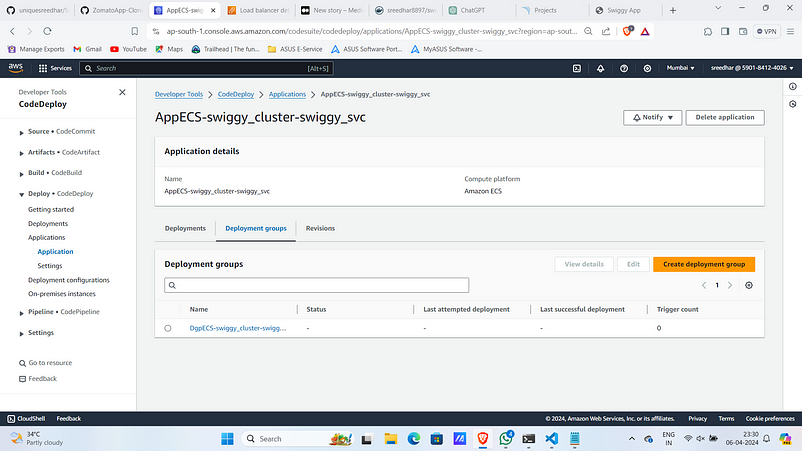
11. This will also create an application and deployment group under “code deploy” section.
12. Create a file named “appspec.yaml” and past the below snippet replacing the task definition arn with yours.
version: 0.0
Resources:
  - TargetService:
      Type: AWS::ECS::Service
      Properties:
        TaskDefinition: "arn:aws:ecs:ap-south-1:<account_id>:task-definition/swiggy:1"
        LoadBalancerInfo:
          ContainerName: "swiggy"
          ContainerPort: 3000
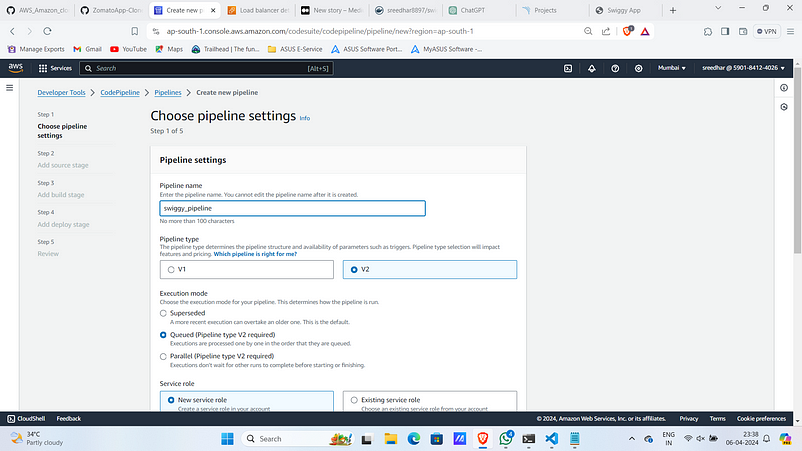
Step:5 :- AWS Code Pipeline Creation
- Navigate to Code Pipeline in AWS console and click on “create pipeline”.

2. Provide a name for it and click on “next”.
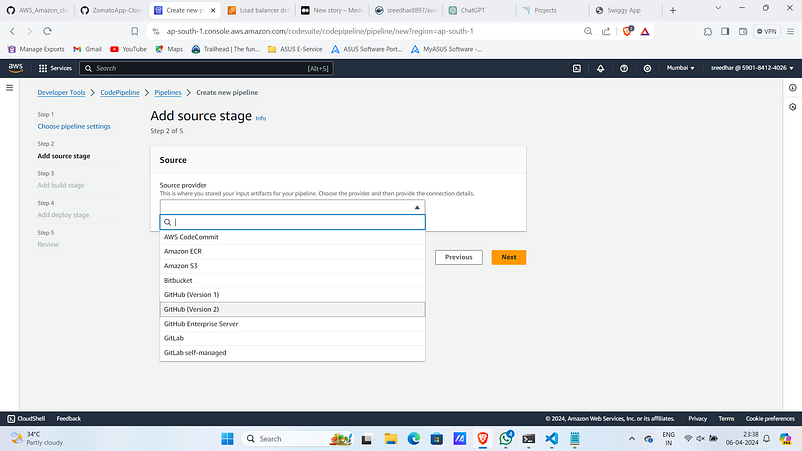
3. In source stage give GitHub(Version 2) as Source.
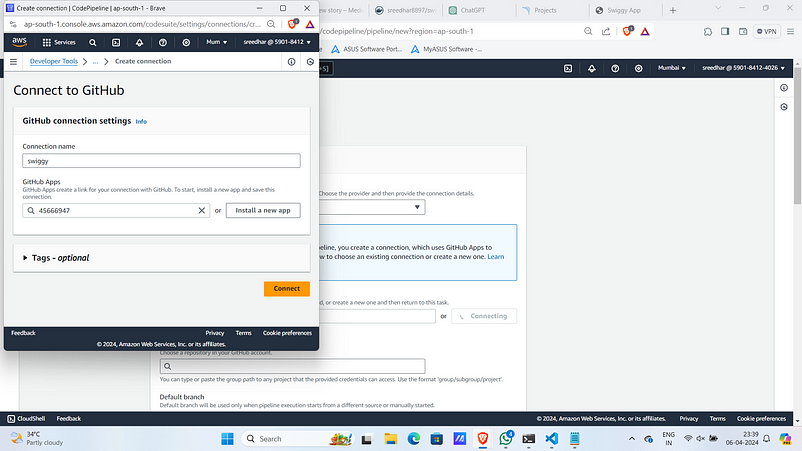
4. For source code you need to provide access for github so click on “Connect to GitHub”.
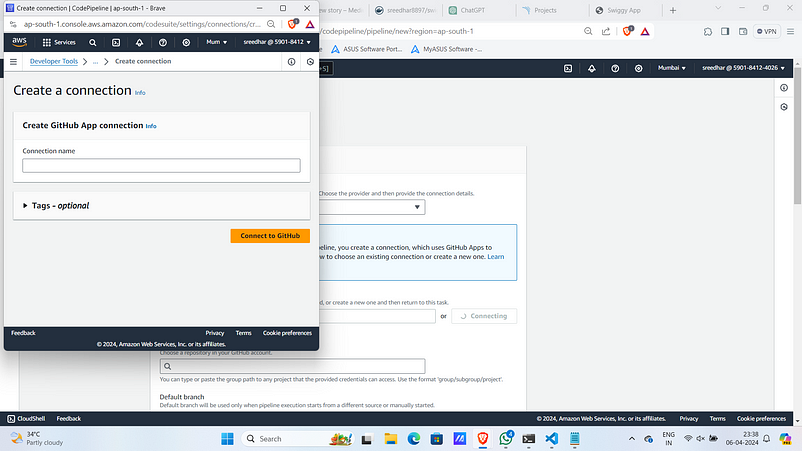
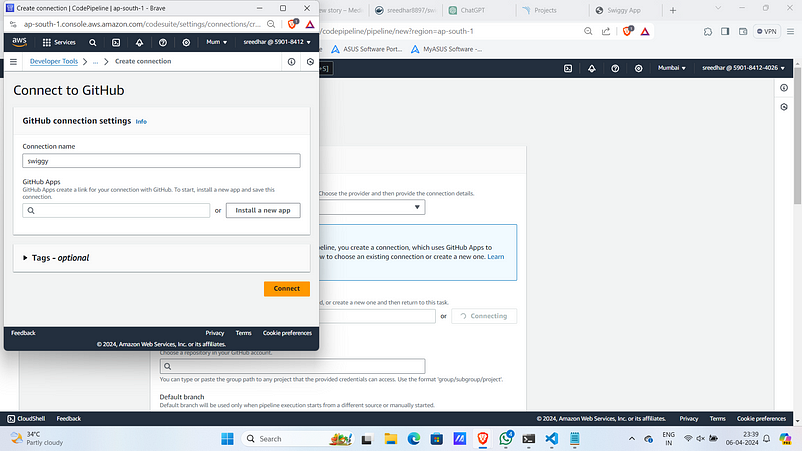
5. Provide a connection name.
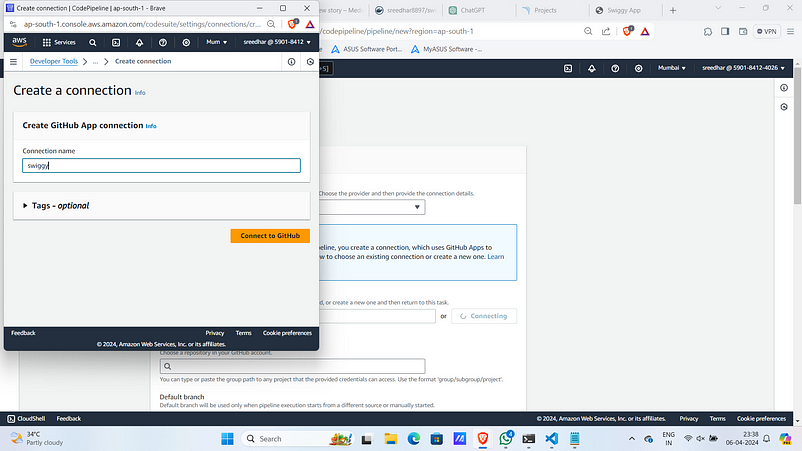
6. Click on “Install a new app”.
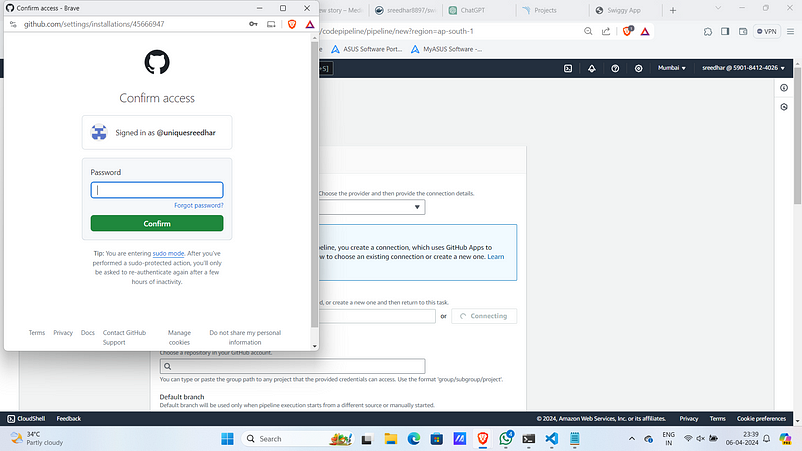
7. Login to GitHub using your credentials.
8. Grant access for that particular repo and save it.
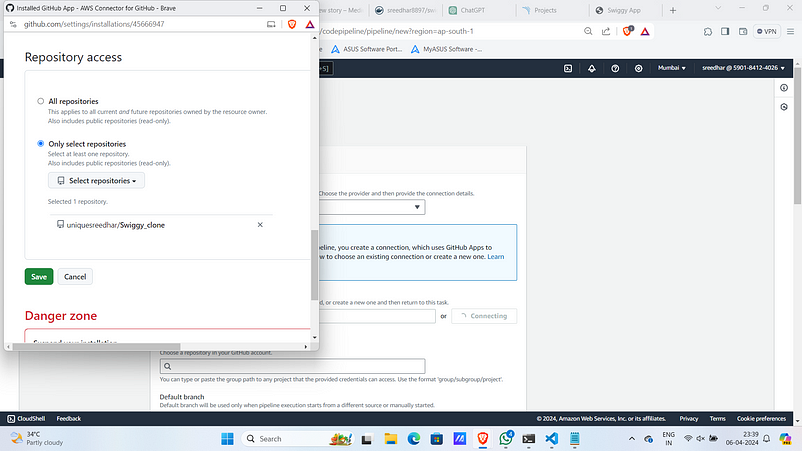
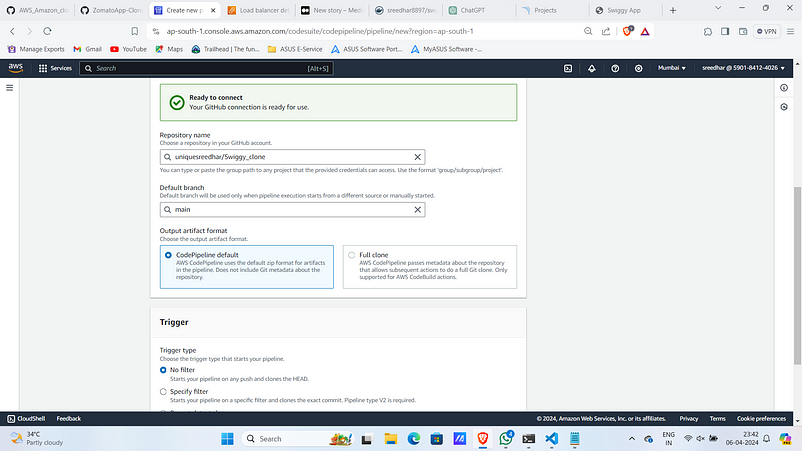
9. Click on connect.
10. Select the repo and the branch. Under trigger type select “No filter”. Click “Next”.
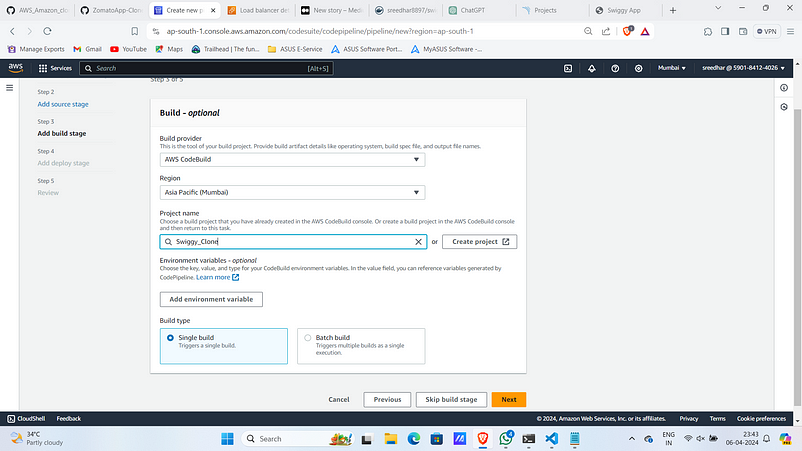
11. Under Build stage add provider as “AWS Code Build”.
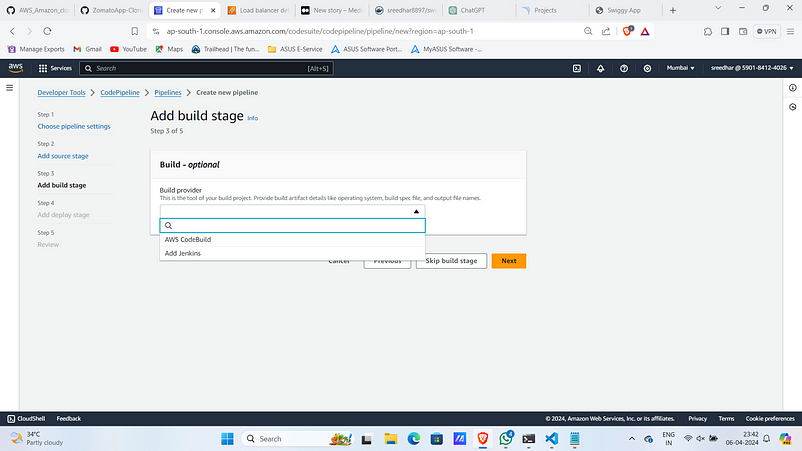
12. Select Project as one created. Click on “next”.
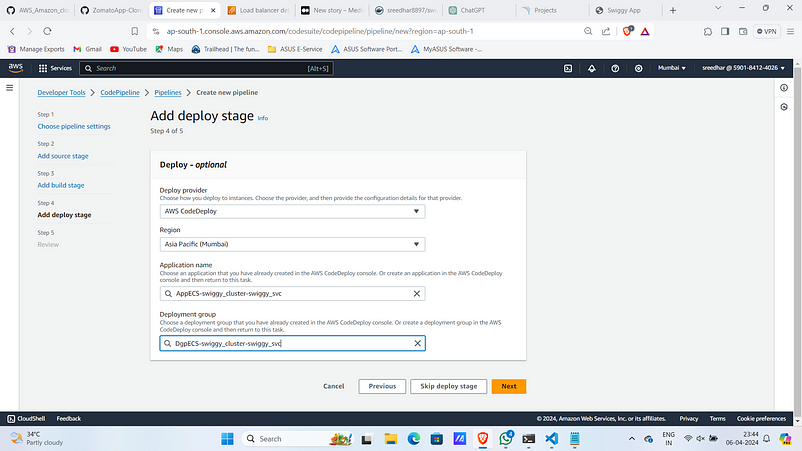
13. Under the deploy stage add AWS CodeDeploy as deploy provider.
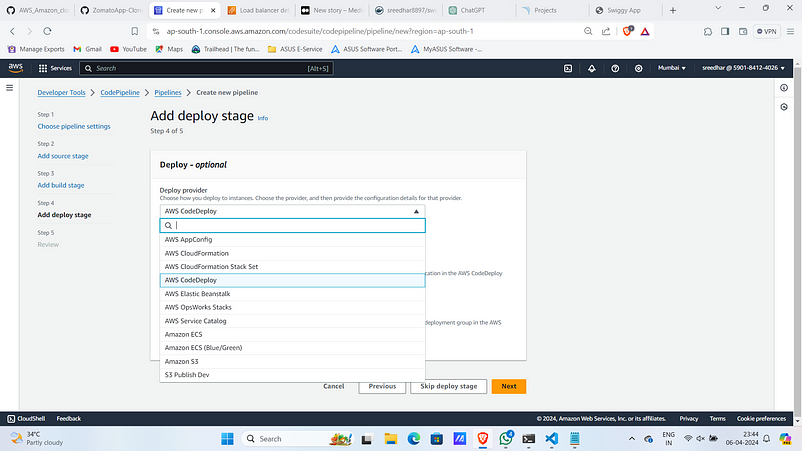
13. Select the application name and deployment group created by the ECS service.
14. Review and Click on “create”.
Step:6 :- ECS Deployment.
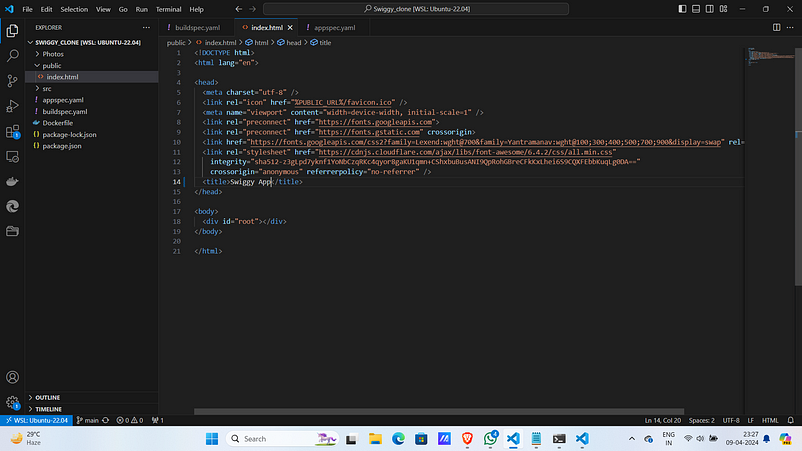
Now make some changes to the application code.
I am doing a change in public/index.html by changing the title.

3. Change it as “Swiggy app” and commit to the GitHub.
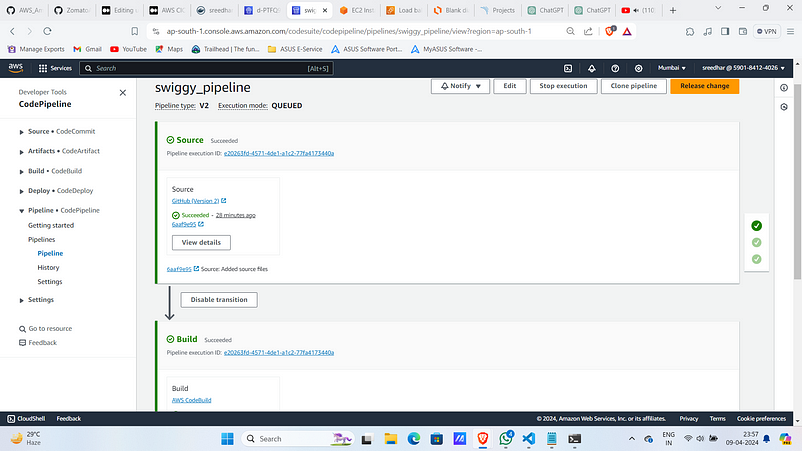
When the push happens code pipeline triggers automatically with webhook.
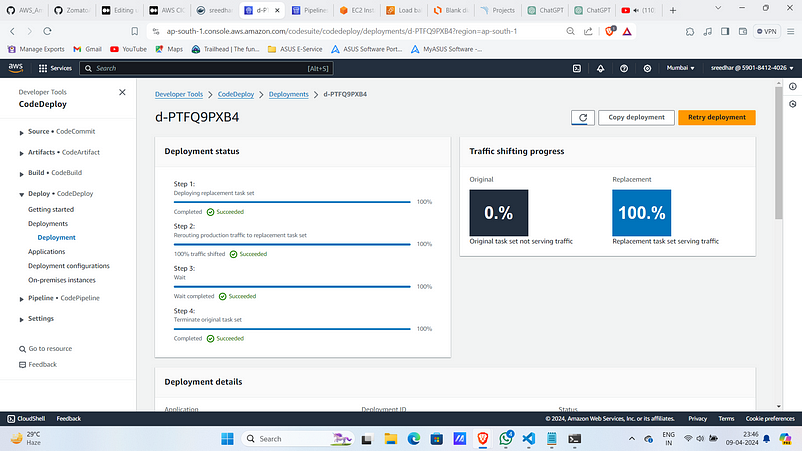
4. Source and Build took usual time but code deploy took much.
5. Navigate to that deployment.
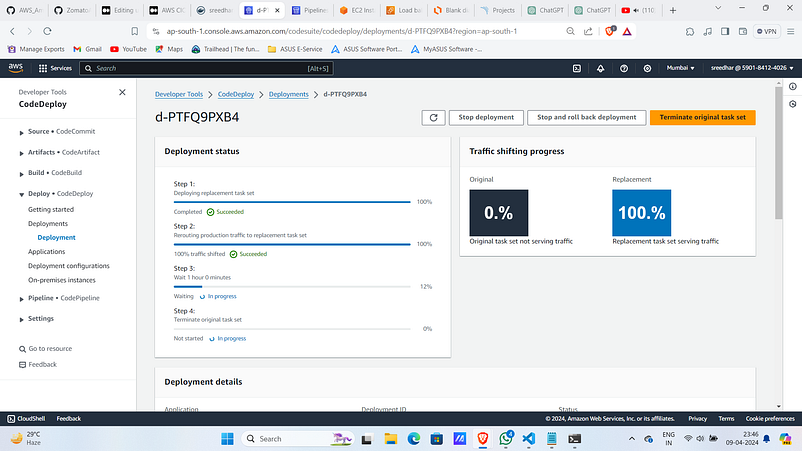
6. If you want both blue and green versions to be running leave it else if you don’t want click on “Terminate original task set”. It tooks less time.
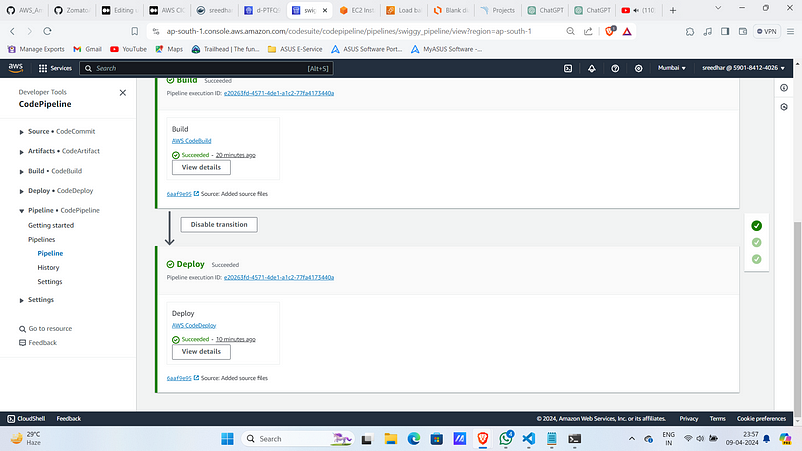
7. Upon success code pipeline looks as :
8. Now navigate to load balancer section and click on the created one.
9. Copy the DNS of that load balancer.
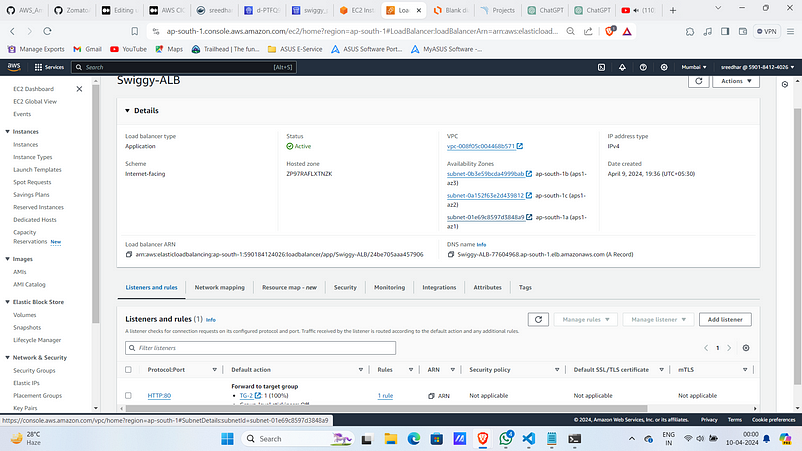
Observe that the traffic is routing to TG-2 (Green) instead of TG-1(Blue).
10. Paste that in your favorite browser.


Observe that the title changed as expected.
Step:-7 : Clean Up
Deleted created Code Pipeline.
Delete ECS Cluster.
Delete Created Code Build.
Delete Sonar-Server EC2 Instance.
Hit the Star! ⭐
If you are planning to use this repository for learning, please give it a star. Thanks!
🛠️ Author & Community
This project is crafted by Harshhaa 💡.
I’d love to hear your feedback! Feel free to share your thoughts.
📧 Connect with me:
- GitHub: @NotHarshhaa
- Blog: ProDevOpsGuy
- Telegram Community: Join Here
⭐ Support the Project
If you found this helpful, consider starring ⭐ the repository and sharing it with your network! 🚀
📢 Stay Connected
